Cycling News & Blog Articles

Stay up-to-date on cycling news, products, and trends from around the world.

How to Measure Your Hubs

By Scott

Bike builds can often revolve around hubs (yes, pun intended). For many bike owners, hubs are the center piece of their bikes. Over the years, I've picked up a couple hubs, either on a deal (like an old Sun Tour XC front hub I snagged for $10 I think) or as a part for a dream build. I bought an early 90's XT rear cassette hub (back in the early 90's) and I have put it aside for a special frame one day.


So let's say that magical day comes. You found some cool rims to go with the hub for your favorite frame. Now, just to order up some spokes and nipples and get started with building a wheel. But, my hubs are old and all the hub data that seems easy to find for a new hub isn't so easy to find. What to do?

First step is to determine what you need to know. Looking at a wheel building web page/spoke calculator is the first place to start. I found my rear hub there:
https://leonard.io/edd/hub/589-shimano-deore-xt-fh-m737-rear

If you're not as lucky and your hub isn't listed on a site, you're not out of luck. With a few measurements, you can get the raw data you need for any spoke calculator and be ready to go.

The main things you need to know for spoke length calculations are:

Hole Count - Your hubs and rims should match each other's hole count.

Lacing Pattern - 2 or 3-cross is the traditional lacing pattern. The number of crosses signifies how many times a spoke crosses other spokes. For other lacing patterns like Radial, 1-cross, and Crow's Foot, consult the manufacturers to confirm whether or not it's ok for that hub/rim.

Traditional 3-cross wheel lacing


The above hub is laced 2-cross on the driveside and radially on the non-drive side. Igor wanted to go with something different and Tommy from Cutlass Velo did the wheel build. It rides quite nicely.

Left and Right Centre to Flange Measurement - This is the distance from the center of the hub to the left (non-driveside) and right (driveside) flange. Here's how to measure these distances:
Figure out the distance between the lock nuts (where the hub sits in the dropouts) - 100 or 110 mm is typical for the front. Most rear wheels are 126, 130, 135, or 142mm (for thru-axles). This is commonly referred to as the OLD (over locknut dimension).Take that number and divide by 2.Then measure from the flange to the lock nut.Subtract that number from step 2's figure (OLD/2) and you have the left/right centre to flange number. Where Your Caliper Is - Digital is great, but analog ones work fine as well. You can do it with a ruler too in a pinch.

It's a good idea to practice with a known, measured hub to make sure you're measuring and calculating things properly.


Hub Flange Diameter - The distance across the hub's flange from hole to hole. A caliper makes measuring this much easier.


Rim Offset - You likely won't need this unless you're building really wide (mid-fat or fat bike) or asymmetrical rims.

Once you have those details, you can put those into the spoke calculator and it will give you some spoke lengths. One thing about spoke calculators is that some will create a spoke length that is slightly longer, others slightly shorter than another calculator. Depending on the brand of spoke you want to use, the spoke length recommended by the calculator may be in between available spoke lengths. So the choice of spoke length is a compromise and one that the person building the wheel should make based on their experience.

If you want to get more in depth into the world of wheel building, you can find it in Jobst Brandt's book, the Bicycle Wheel.  Sheldon Brown's site has a great section about Jobst here. Wheel Fanatyk is another great wheel building site with a ton of info and great pictures. Ric at Wheel Fanatyk is one of the folks behind Wheelsmith and an absolute master wheel builder. Lots of stuff on his site to read through and try and absorb.

Wheel building is a fantastic skill to have. Not only can you build any sort of hub/spoke/rim combination to suit your particular build, it also opens up new bike build ideas that you may not have considered.


  560 Hits

Klunker Bars and More Back in Stock

A new shipping container packed with Velo Orange favorites landed at the warehouse yesterday. Items back in stock include a selection of handlebars, rims, stems, fenders, and accessories that many of you have been eager to get your hands on.


Our always popular Klunker Bars are back in both noir and nickel finishes. We've received too many phone calls and emails asking when we would have more. We're always impressed by the demand and look forward to seeing all of your Klunk'd up bikes in the future.

More on the handlebar front: Nouveau Randonneur handlebars are now well-stocked in all sizes. Granola Bars and Curvy Bars in silver and noir are also here.

Our rim lineup has been replenished. We once again have 32- and 36-hole Voyager and Enterprise rims in 650b, 700c, 26", and 27" sizes.

The container also brought a couple of new items. We're really excited to now offer our Mojave and Moderniste water bottle cages in Noir. These are the first black bottle cages we have made, and they will go great in combination with our other noir components for your blacked-out builds.


We have also restocked Happy Stems, wheel stabilizers, saddle loops, bottom bracket tools, a range of fender sizes, and more. Take a look around the site if you have been waiting for something and don't see it mentioned here. As always, you can sign up for notifications to receive an email when a sold-out item comes back in stock. We'll have more, including Crazy Bars, arriving next month.


  409 Hits

Is It That Weird? A Very Speedy Pass Hunter with Carbon Bits

by Igor


"Whoa that's weird. But everything makes sense." That's what Adrian said when I first unveiled my completed Pass Hunter. I knew I wanted a lightweight bike, and this Pass Hunter would be the perfect testbed for such a rig featuring some major carbon components. It will be my road bike (I know, bad word today), credit card tourer, I'm-late-for-work commuter, and fast all-roader. Needless to say, as long as I have the legs, it'll be very speedy and fun. Now let's dig in.

One of the design intentions of the Pass Hunter was to ensure carbon fork compatibility, hence the tapered (1 1/8" to 1 1/2" ) headtube. We selected the Whisky RD9+ fork for a variety of reasons including: axle to crown and rake similar to the steel fork, nice fender mounting, easily obtained, and consistently stocked. I'm very pleased with the ride quality of the front end. It feels light when you throw it into a corner or around obstacles, confident on descents, and planted for long days in the saddle.

The wheels feature VO prototype thru-axle hubs laced to Nextie "gravel" 45mm deep-section carbon rims. Tommy of Cutlass Velo in Baltimore laced them up with Pillar PDB1416 spokes and brass nipples. He reported that they tensioned up well. He tubeless'ed them up with Rene Herse Babyshoe Pass in their Extralight carcass-way.


While the benefits of carbon rims are limited mostly to light and stiff, my real 'want' was the sound. That is, when you put the hammer down the hollow whoosh-whoosh-whoosh-whoosh sound the wheels generate is really intoxicating.

The wheels are all wrapped up with our Noir 58mm Wavy Fenders. The rounded details of the bike's tubes and bends pairs nicely with the flowy design of the fenders.


The bike features Campagnolo Athena 11sp inter-grifters, dangler, and pusher. This group, in my opinion, is the last generation of the beautiful and elegant shifting components. I really hope they bring a fully polished silver group back in the future, as I find the ergonomics of their inter-grifters are superior to other offerings.


The crankset is our 50.4 with 46/30 rings and the rear features a corn-cob of 11-25. I would have chosen an 11-29, but I already had the cassette from another build.


The cockpit features our Nouveau Randonneur Bars, Comfy Cotton Tape wrapped in our Leather Tape, and Alloy Bar Plugs.


A Mini-Rando Bag paired with a vintage Trek Bomber Saddle Bag is the perfect capacity for a moderate amount of stuff.


The perch features two VO prototypes. One is a medium setback post, and the other is a saddle with a cutout. The seatpost is good. The saddle will take more time to evaluate. Adrian is testing a different one with a cutout that has already become her saddle of choice.

While this build isn't for everyone, we (VO) must try new technologies and designs to see what they're about and how we actually feel about them. Dying on a hill without even giving something a chance stifles our growth as people and as a company. Sometimes it can feel uncomfortable to deviate from what you've grown accustomed to, and that's normal.


For example, I wrote a blog post nearly three years ago about tubeless rims and tires. I wrote it after a bad experience with a certain setup and frustration with the lack of standards. But then I gave it another shot with a new setup and with new prototype rims we had been developing. And you know what? Tubeless is pretty awesome and suggest it for most applications.

From a personal and business perspective, I've always been one to have a positive attitude with regards to different styles of bikes and builds. I'm happy to give my opinions on things, though. A rising tide lifts all boats as they say.


  446 Hits

Some Videos to Watch as You Digest

By Scott

We'll be closed Thursday and Friday of this week for Thanksgiving. We'll be back in the office on Monday, Dec 2nd at 9 am.

Normally, I'm all for the world of the written word - I've recommended books and such in the past, but I thought perhaps I'd throw some videos into play this year. Here in the Northern Hemisphere, the darkness is falling and unless you have skookum lights like the one Igor has on the Pass Hunter, you are likely still spending more time inside rather then out.

So here are some movies/videos/features to watch over the next while. I'm not trying to encourage anti-social behaviour (watching these around the dinner table may get you hairy eyeballs) - but I think these are entertaining for even the non-cycling members of the family.

I Just Want To Ride - Lael Wilcox's story of this years Tour Divide from Banff, Canada down to the Mexico border. Some great views of a wonderful part of the country and a very interesting person to get to know over the 38 minutes of the movie.
https://youtu.be/AEEGIt6FC34


The Suilven Escape by Alastair Humphrey's is a great example of multi model travel- Train, bikes and pack rafts, with a bit of hiking thrown in there. Al does great videos and this little 7 minute movie will get you looking at Scotland and train schedules quickly
https://www.youtube.com/watch?v=Rh2Y68zbW6I&feature=emb_title


Last Woman Standing- a movie not cycling related at all, but a great story of persistence and fortitude. It's a movie about one woman- Nicky Spinks from the UK- and her attempt to finish the Barkely Marathons. Its a trail running race in Tennessee and it's one of the hardest events to finish in the world.
https://www.youtube.com/watch?v=dJAW8STfiko


This is one of my favorite one-shot, continuous videos. It features Brandon Semenuk, a world-renowned slopestyle rider doing what he does best.
https://www.youtube.com/watch?v=oQDLAoPs-as


The Stars and The Water Carriers is a documentary following the 1973 Grio d'Italia. If you haven't watched classic cycling races, this is a great one to get into the mindset.
https://www.youtube.com/watch?v=ZUIr9LG1juw


Have a safe and wonderful Thanksgiving! We'll see you on Monday!


  429 Hits

Flat Bar Pass Hunter with 9speed Microshift Advent

by Igor


Whenever we get in frame prototypes, we build them up in a variety of ways to make sure all of your (pointing at you) weird builds will go smoothly and ride as anticipated. So we'll do drop bars, flat bars, alt-bars, commuter, lightweight, touring, and single speed (frame dependent). It's a great opportunity to test out new groupsets and new setups we have been eager to try. Enter Microshift Advent.


We've built up bikes with Campagnolo, SRAM hydro, Shimano GRX, dynamo lighting, and other neat setups, but I've been particularly excited for this oddball 9 speed groupset. The idea is to create an affordable 9speed, 1x setup with a clutch'd derailleur and wide range, 11-42 cassette.


Worth noting is that the 9 speed Advent groupset retails for $120. For comparison, $120 buys you just the pulleys of a SRAM Red AXS rear derailleur. Just the pulleys!

New 11 and 12sp setups can be fiddly because everything is narrow and a slight bit of cable tension adjustment can make a perfect or mediocre shift. With 9 speed, the amount of slop is refreshing. I use "slop" in a good way here. The actual shifting is crisp and consistent, but the wider tolerances of the cogs and chain makes for super easy and quick setup with absolutely minimal futzing.


While the clutch engagement can be turned off, I don't know why you would in exchange for never having to worry about dropping your chain. Shifting requires maybe 5% more thumb strength, but think of it as strength training, really.


The cable exit on the rear derailleur is a little funky on the higher gears (straightens out on the low side), but it doesn't seem to have any effect on shifting performance at all. It's probably designed this way to skirt any patents that the Big 3 have.


I've ridden the bike a lot this week and I really, really like the setup. It's zippy, fun, simple, and lightweight. I'll likely add a basket and bag at some point, but am happy with how it is set up for now.


PS. Tektro makes a flat-mount dual-piston actuated brake (model MD-C550) that's virtually the same as the TRP Spyre, for half the price. We really are in the golden age of cheap n' good components.


  461 Hits

A Robo-Neutrino with SRAM Force eTap

by Igor

When Brook from SRAM emailed us asking about getting a Neutrino, I was incredibly intrigued. Is this a personal commuter? Traveler? Are they coming out with mini-velo components? Turns out, they wanted a fun and approachable bike to showcase their new eTap AXS Wireless Force components both at their booth and seminar for Philly Bike Expo. Enter Robo-Neutrino...


The idea is that while SRAM often shows these items on high-zoot mountain and road bikes, they haven't really told folks about the benefits and flexibility of the wireless platform on a bike that will see more practical urban use. While I cannot speak to the long term reliability (I'm sure it's good), the performance and ergonomics of the system is really fantastic.


The rocker button is in a perfect place for your thumb, leaving plenty of room for your hand on the grip. Additionally, the shifter can tell the derailleur to dump gears up and down simply by holding the respective button. It's pretty neat.


On the left side side sits the remote dropper lever. It's just a button. Press it once while sitting on the saddle and the post goes down. Press it again and the post goes up. It's a nice speed too. Putting a dropper on the Neutrino makes the bike that much smaller when space is at a premium. 


It also had a Force crankset and SRAM Hubs.


Stopping is handled by their Level Hydraulic Brakeset. It stopped those tiny wheels with ease and comfort.


The part that brings the whole kit together is Sram's controller app for your phone. You can program all the buttons, monitor component readiness, update firmware, and personalize component behavior. It's all pretty trick.


What do you think of this Robo-Neutrino? Whether it's Mavic Zap, SRAM eTap, Campy EPS, Shimano Di2, or otherwise, have you tried electronic shifting?


  470 Hits

2019 Philly Bike Expo Roundup

by Igor

Another amazing Philly Bike Expo is in the books! It was stellar to catch up with old friends, meet new ones, talk about our new and upcoming products, and generally nerd-out on bikes and bits. As tradition (2018, 2017, and 2016) dictates, here's our 2019 round up of bikes that caught our attention!


I'm going to start this off with a bang. This Pedalino stole the show this year. It won People's Choice and stole my heart. The frame is stainless steel and features tons and tons of custom machine work and anodized titanium ornamentation to create one super unique Gravel Grinder.


The fully custom, modular dropouts are absolutely stunning and take an otherwise standard piece to a level I've not seen before.


This Item4 is a collaboration between Bishop Bikes (located just North of us in Baltimore), Metal Guru, and Cutlass Velo (also in B-More). The Item4 platform is designed to be a semi-custom, all-rounder with performance and versatility in mind. It's your road, gravel, and randonneur all-in-one neat and lightweight package, and boy does it rip.


This Royal H roadie is a very cool blending of old and new. Cutouts and contrasting job abound. 


Love it or hate it, this Stronglight headset was definitely a conversation starter!


Cutouts e-v-e-r-ywhere. Even when you think you've seen them all.


I always love a good themed bike. This Beardman plus touring bike was fun, a tad spooky, and clever.


Get it? Tombstone?


A super simple and lightweight city bike from Zukas.


With a terrifically clean rear lamp. I believe it is elevated to gain some vertically clearance above the fender. It also looks amazing.


The wild paintjobs attracted me to the Weis Manufacturing booth, and the seatstays on their Hammer series kept me around. 


Made from aluminum alloy, the Hammer Road is designed for maximum power transfer. It looks fast.


You don't often see full-custom full-squish mountain bikes, so it's always a treat when you get to see one up close. This raw one from Moth Attack was super clean and will definitely be a blast through the rooty trails we have here. 


Breismeister always come through with the most fun paintjobs and unique, intricate framework.


Again, a big thank you to all who came by the booth, said hi, shared stories, and grabbed a seltzer. We're glad you could make it out. See you next time!


  462 Hits

Polyvalent Low Kicker and Pass Hunter Pre-Sales are Live!

The next generation Polyvalents and Pass Hunters are in production! We have had so much interest in them, we decided to open up a pre-order so folks can get their frame spoken for.

So, without further ado, let's jump in!


The Polyvalent is our longest running and most versatile frameset. If you wanted something that you could use for your commute, a full RUSA randonneuring series, AND go on an extended tour, the Polyvalent is your best choice.


This Low Kicker variant features a low-slung top tube and we're excited to offer this configuration. Fully loaded tourists will find it significantly easier to mount and dismount. Riders with limited flexibility will be able to ride a seriously capable and fun bike without compromising performance. Lastly, riders down to 5' will be able to have a very comfortable position with both drop and flat bars.

Here are the specifications of the frameset:
Frameset material: 4130 double butted chromoly steel, with "Low Kicker" top tube for easy on and offFork: 1 1/8" threadless, 4130 double-butted chromoly steel with elegant fork bendWheel Size: 650B or 26" Tire Clearance: 650B x 47mm, 26 x 2.3" (either with fenders)Rear Spacing: 12x142mm thru-axleFront Spacing: 12x100mm thru-axleBB: English threaded 68mmBrakes: IS mount disc, 160mmSeatpost size: 27.2mmFront Derailleur Size: 28.6mmWater bottle mounts: Triple mount on top of downtube and one set on underside of downtubeFender bosses: seat stay bridge, chainstay bridge, under fork crownRear Dropouts: Vertical with aluminium alloy replaceable hangerFrame Eyelets: Double eyelets on rear dropouts for racks and fenders, internal eyelets on seat staysFork Eyelets: Double eyelets on fork dropouts for racks and fenders, triple thru-bosses on the blades for lowrider racks or cargo cages, hourglass braze-on for Randonneur or Campeur RacksRear Brake Routing: Easy internal routing for rear brake cable housing/hydraulic tubingPaint: Metallic Sage - Final production run with have metallic VeloORANGE logo
And the geometry!


The Pass Hunter is the speediest of our bikes and is designed for light-packing adventures over mountain passes, Sport Touring, and even the weekend club ride!


While this may look like a traditional randonneur, don't let that elegant Cool Blue and nostalgic 80's Burgundy paint and metallic logos fool you. This frameset is packed with modern design and features.

The wishbone rear triangle is a Velo Orange custom arrangement. By simplifying the connection points, it makes the rear end light and springy for optimal power transfer.


The main triangle uses an oversized 35.0mm downtube and a standard 28.6 top tube. It makes the bike planted, comfortable, and with flex in all the right places.

Lastly, the front end. The headtube is tapered to allow the use of aftermarket carbon forks that are available such as Rodeo Labs and Whisky, along with many others that fit into the "utili-fork" genre.


Here are all the frame highlights and details!
Frameset material: 4130 double butted chromoly steelFork: 1 1/8" -> 1 1/2" tapered threadless, 4130 double-butted chromoly steelWheel Size: 650b or 700cTire Clearance: 650Bx47mm or 700x32mm w/ fendersRear Spacing: 12x142mm thru-axleFront Spacing: 12x100mm thru-axleBB: English threaded 68mmBrakes: Flat Mount disc, 140mm rotor compatibleSeatpost size: 27.2mm, non-integrated seat collar (not included)Front Derailleur Size: 28.6mmWater bottle mounts: Double on top of downtube, under downtube, and on seattubeFender bosses: seat stay bridge, chainstay bridge, under fork crownRear Dropouts: Vertical with aluminium alloy replaceable hangerFrame Eyelets: Single eyelets on rear dropouts for fenders, internal eyelets on seat staysFork Eyelets: Double eyelets on fork dropouts for racks and fenders, triple thru-bosses on the blades for cargo cages, hourglass braze-on for Randonneur RackRear Brake Routing: Easy internal routing for rear brake cable housing/hydraulic tubingPaint: Cool Blue or Burgundy Red with metallic VeloORANGE logo
and the geometry:


  504 Hits

A Message From Velo Orange

We stand in solidarity with Black, Indigenous, and People of Color. Our country is fractured by systemic racism and social injustices that have been ingrained in so many parts of our society and for so long. We will not and cannot sit on the sidelines and ignore those who are in need - that's part of the problem. We are calling on other companies and anyone who has a platform to help raise further awareness and funds for BIPOC organizations. Velo Orange will be donating to each of these organizations and fundraisers, and we encourage anyone who can (even a few dollars) to donate as well.

  477 Hits

Mega List of Project Updates!

by Igor

I first wanted to start off with a huge thank you to all of our customers, readers, suppliers, and staff for your support during these strange times.

Velo Orange is a strong company, and in the midst of challenging times like these, we're adapting and moving forward. We wanted to share some of the moves we're making that we're proud of, and look forward to coming to fruition.

Polyvalents


We've designed, tested, prototyped, and have sent the next generation Polyvalents into production. And let me tell you - they are a blast! We're offering two frame styles: "Low-Kicker" and "Diamond."

The first production run is going to be in the "Low-Kicker" configuration. In addition to being able to get on and off the saddle easily at stoplights, this low-slung top tube setup is a great option for lots of different riders. Fully loaded tourists will find it significantly easier to mount and dismount. Riders with limited flexibility will be able to ride a seriously capable and fun bike without compromising performance. Lastly, riders down to 5' will be able to have a very comfortable position with both drop and flat bars.

We'll also be offering a diamond-frame option for those after a more traditional look. These are just going into testing, but here is a raw frame picture.


Both will be in this absolutely stunning Metallic Sage paint. These should be available around October. We'll be opening up a pre-sale soon with more info, geometry, and close-ups, so stay tuned.


Pass Hunters


We've just gotten the final prototypes of the Pass Hunters and they are sooooo good. I'm super excited to be offering the (in my opinion) perfect "Sport Touring Bike."


The first Pass Hunter design called for the smaller sizes to be built around a 26x45mm tire size, but in the time of prototyping and testing the first iteration, this tire size is simply no longer common or available. We even talked to a number of rim and tire manufacturers who were discontinuing performance-oriented 26" rims and tires. Bummer. No worries, we've re-designed the framesets to accommodate 650bx47mm or 700x32mm tires and fenders across the board.


They've already passed testing and are going into production shortly, once we've ok'd everything on our end. They'll be available in both Brick Red and Sky Blue. We'll be doing a pre-sale for these as well.

Hubs


And for these thru-axle frames, new hubs are in production! This new rear hub shell is a custom design with a ratchet housing based off the classic, smooth-lined Record (my favorite). The design will retain our tool-free disassembly and maintenance and will include QR end caps for those who are using QR disc hubs. We'll have rim brake hub options, too.

Noir Flat Pack Rack


Since we got the Flat Pack Rack in, we've had a ton of interest in a Noir-ified version, alas stainless steel cannot be anodized or reliably powdercoated. But! A sample just arrived of a powdercoated chromoly steel version and I quickly mounted it on my Pass Hunter. It's just as strong, weighs the same, and is as easily adjusted. These will go into production soon.

Lucky Bars


What's one better than lucky #7? Lucky #8 of course! They have 8cm of rise, 800mm of width, and 8 degrees of sweep.

These are still in the prototyping phase, but they are fun!

Doover Saddle/Handlebar Bag


Another addition to the Velo Orange X Road Runner Bags luggage collaboration! The Doover, meaning thingamabob/thingamajig, is perfect for mounting at the front as a handlebar bag or on your saddle! In both cases, it can be used with or without a supporting rack. It is waterproof, cavernous, uses a roll top closure, and includes side webbing to use our existing Cell Phone and Snapper Sack accessory pockets. We're still testing them, but here's a picture.


Piolets

We're getting more Piolets in Fall, and in a new color. We'll reveal the color when we decide what it will be =)

Wheels

We're getting more 650b and 20" mini-velo wheels within the next few weeks. Thanks for your patience.

Two Container Arrivals

We're expecting two container arrivals: one in June and one in July. Both will have parts and accessories that you have been waiting on. The first of which will include Klunker Bars, Quill Stems, Granola Bars, Curvy Bars, Wheel Stabilizers, Copenhagen Kickstands, Noir Sabot Pedals, Happy Stems, and Voyager Rims.

The next one will have Crazy BarsRemovable Faceplate Quill Stems, and some other miscellanea that didn't fit in the first container.

Be sure to sign up for automated product alerts for the respective products you've asked about. Most of these items are extremely popular and go out the door fast.

We're also expecting a shipment of Blue Lug handlebars and Brass pieces to arrive within the next two weeks.

International Orders

We've had a few overseas folks say that their packages have been stuck in Jamaica Plains, NY or other USPS hubs. The issue is that USPS doesn't own their own planes, so they ship packages on passenger airplanes or contract through carriers like FedEx. Well, people aren't flying nearly as much anymore, so these hubs are getting severely backed up.

We have started shipping most international orders through FedEx to prevent delays in getting products to you. Depending on what's in your order and where you are, we may have to invoice you because of these increases in shipping costs, in which case we will email you first.

So that about wraps up all of the new and exciting things coming out of VO HQ right now. All of these new projects have kept us enthusiastic and engaged in an otherwise trying time. Thanks again, stay safe, comment if you have something on your mind, and as always - Happy Riding!


  476 Hits

New Color for the VO Luggage Line, Coyote

The Velo Orange by Road Runner bag line continues with the introduction of a new color, Coyote.

Not quite brown, not quite tan, the Coyote shade is perfect for adding a big helping of class and sophistication to both modern and classic bikes. It also matches a bunch of tan sidewall tires. Not that you ever thought about matching your bags to your tires, that is, right?

The Coyote offering is currently available in each of our bag styles. We also made a few minor changes to some of the products, which are listed below:
RandonneurMini-RandoTransporteur - We updated this bag with an orange inner liner instead of the grey. We'll be going orange from here on out.Day Tripper - Now has new buckles that work better with full-fingered gloves.Snapper SackCell Phone Pocket
We also re-stocked on several models and colors, so be on the lookout for automated email notifications letting you know that the bag is back in stock.


  453 Hits

An Epic Tour of the C.O.L.T. with N+1 and Friends

A guest post by Taylor Doyle

The C.O.L.T. (Central Ontario Loop Trail) with N + 1 Cycle and friends


Pre trip

The obligatory group chat before any adventure is always a great way to get stoked. Ask your friends stupid questions, compare your kit and preparedness with fellow riders, and discuss all of the things that could go wrong. Do we really want to try and wild camp that night? Aren’t showers …nice? How much water do we need to carry? No matter how much you prepare, there is always a naivety felt when you look back once the trip is over. The unforeseen challenges of a trip through new territories are always a surprise. Fast forward to the end of the final day, crusty and dusty back in the parking lot at Ganaraska Forest Centre, most of us said it was an epic adventure, but, we probably didn’t need to do it again, ever! Nearly 7 months later, under COVID-19 lockdown, and I am raring to go (and finally writing about it). Type two fun was had. My body has forgotten the discomfort and only remembers beautiful Canadian scenery, buds on bikes, fireside evenings, and sweet trails that I had never ridden anything like before.


My love of multi-day touring by bicycle started in Ontario, but this was my first truly off-road tour, and I could hardly wait. We largely had Jason to thank for all of the planning and route research. Jason Hallows and Dickson Bou co-own 
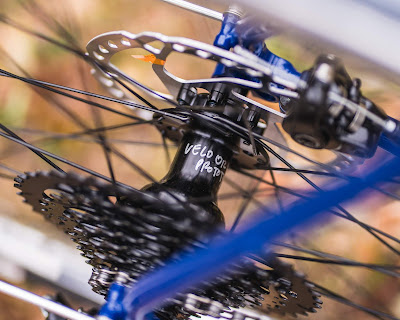
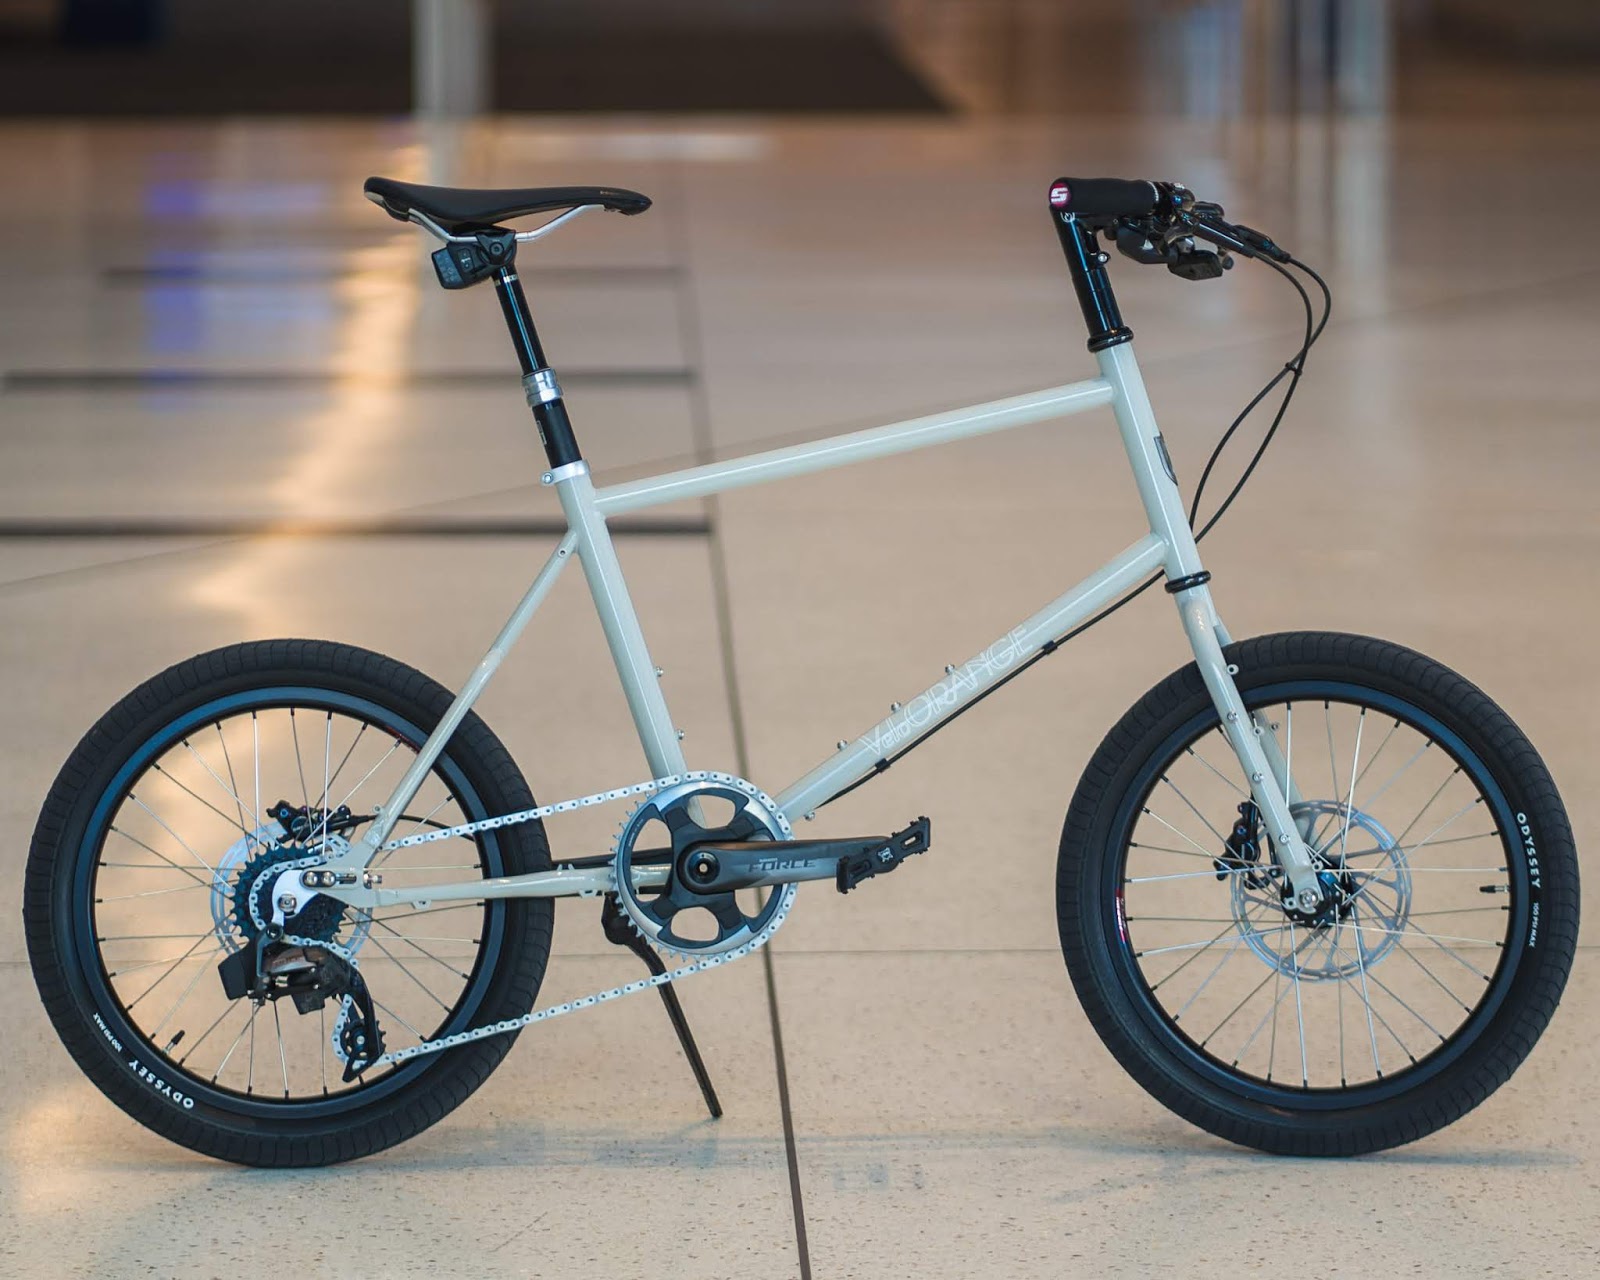
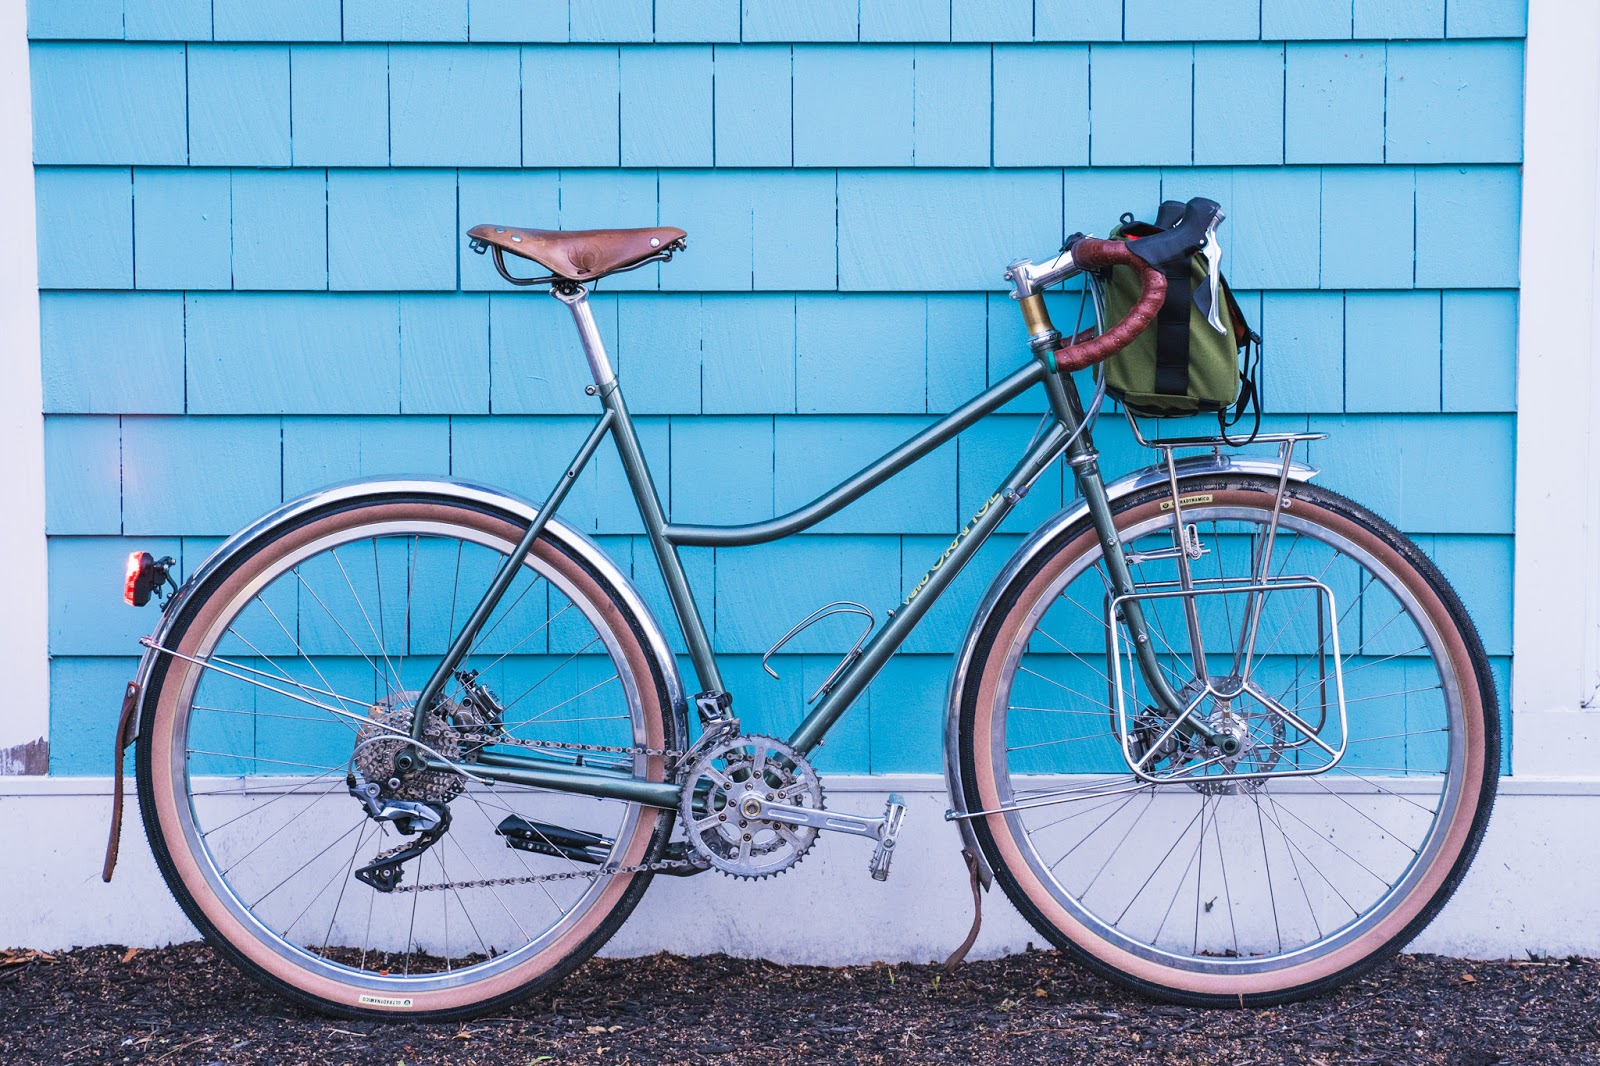
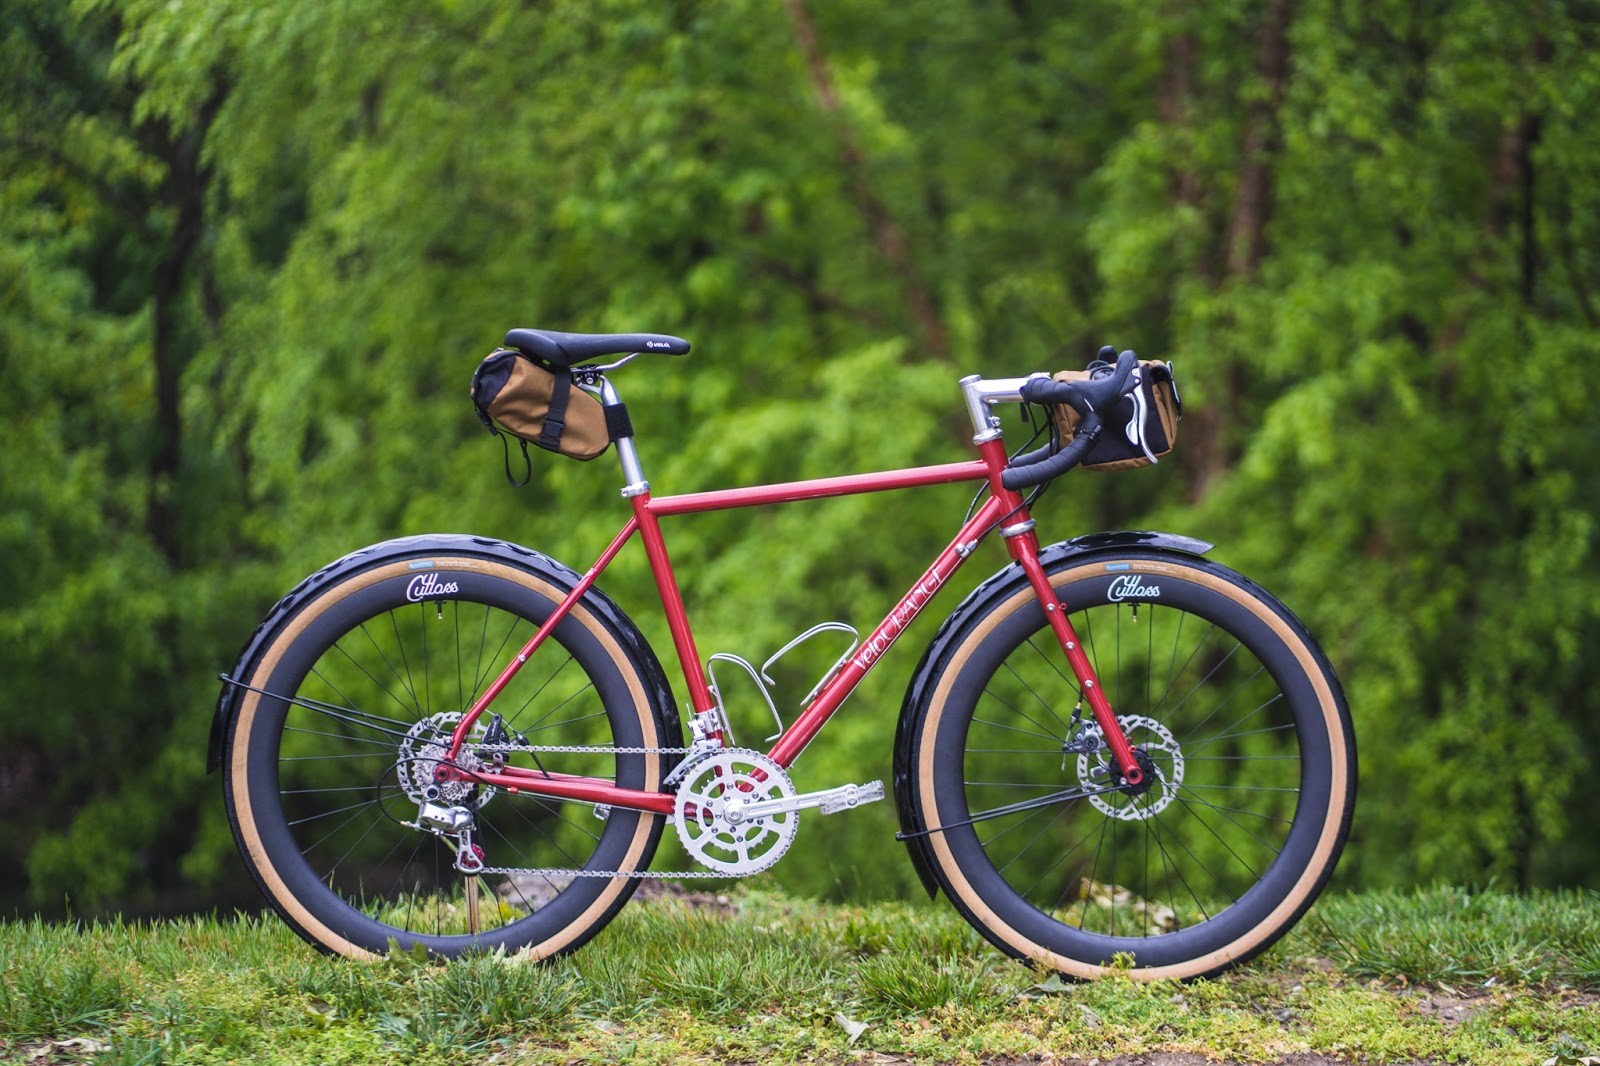
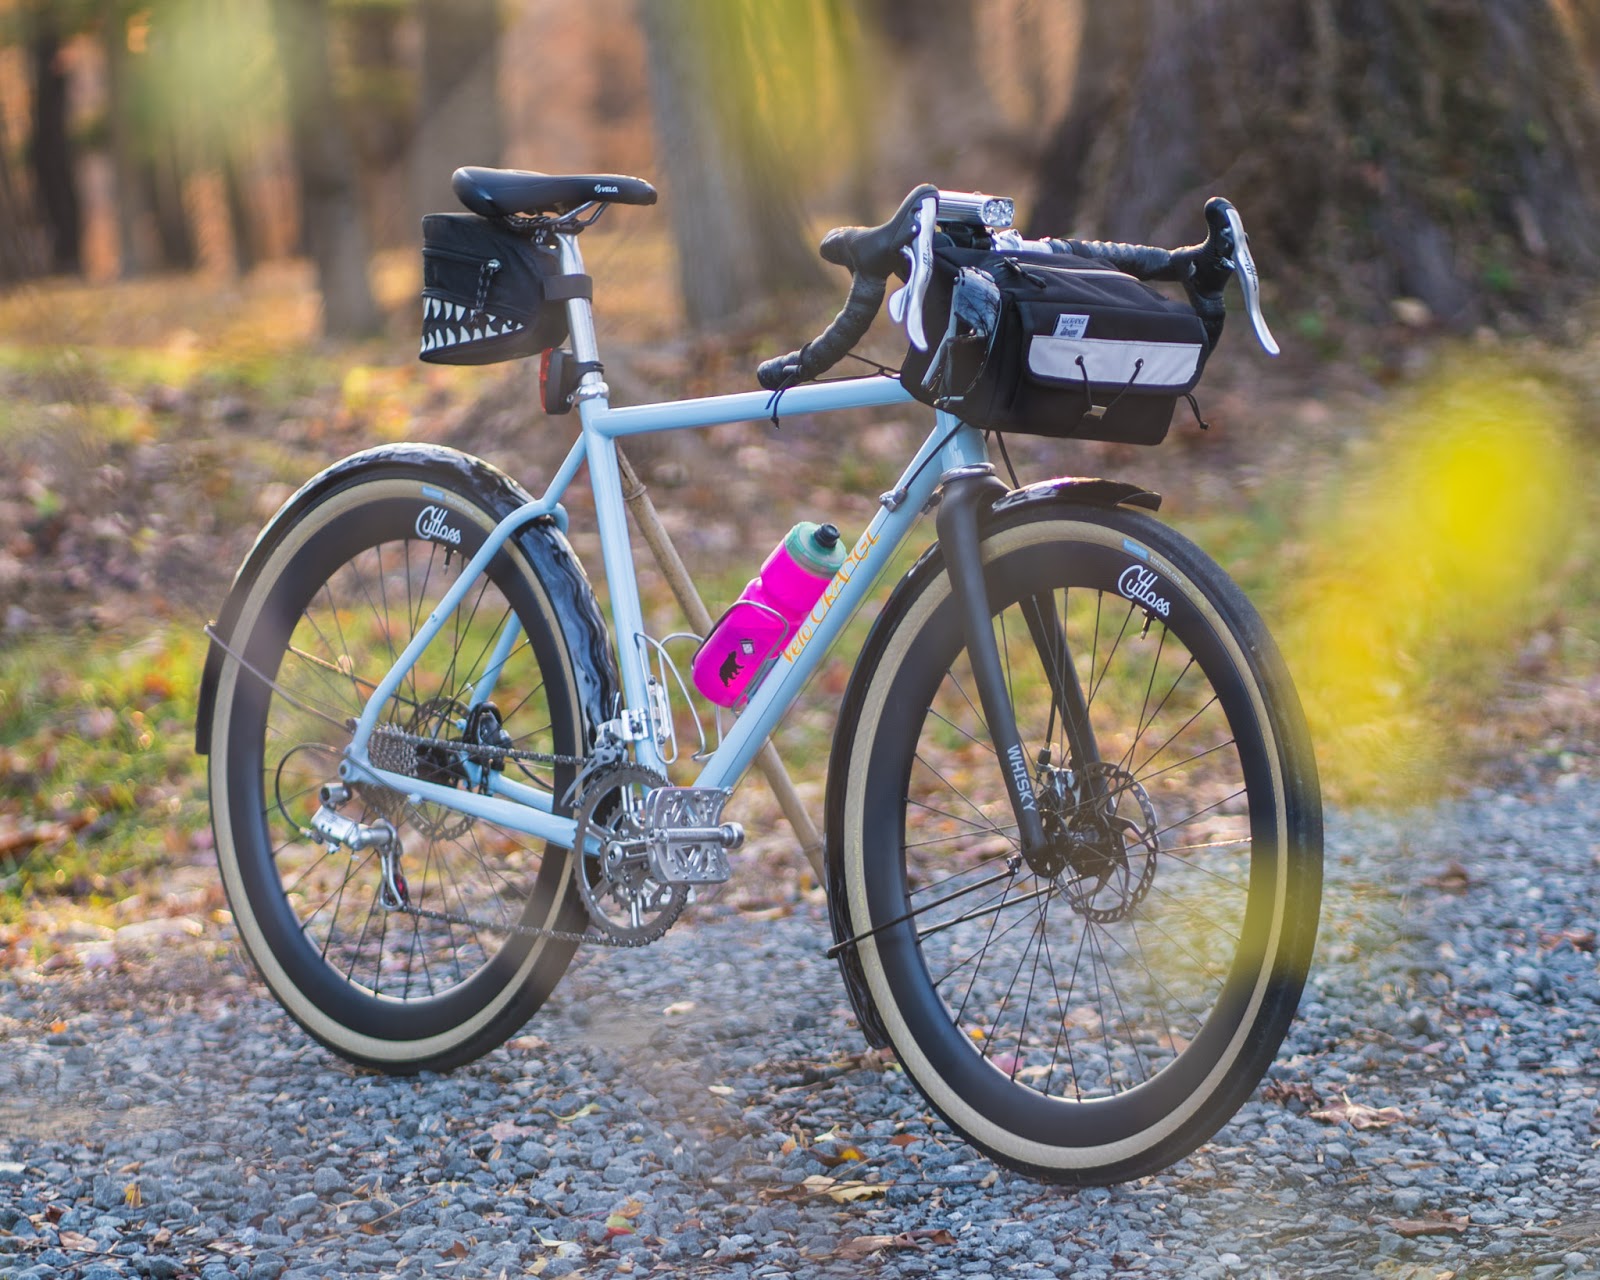
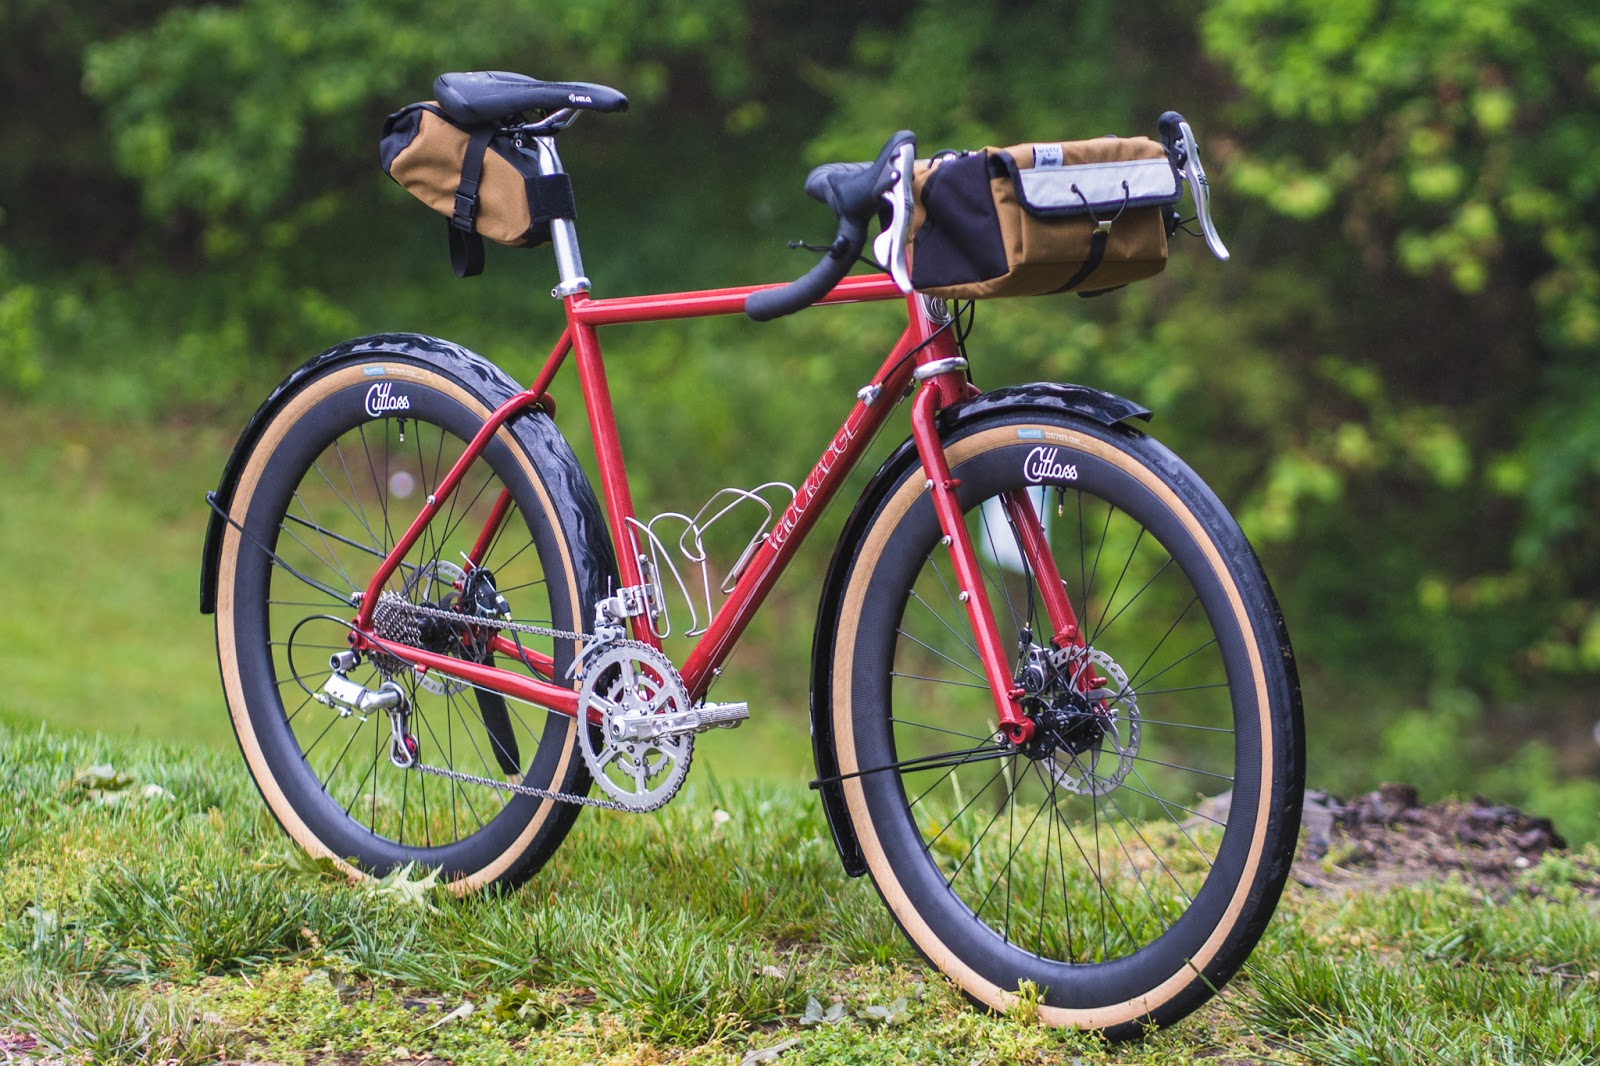
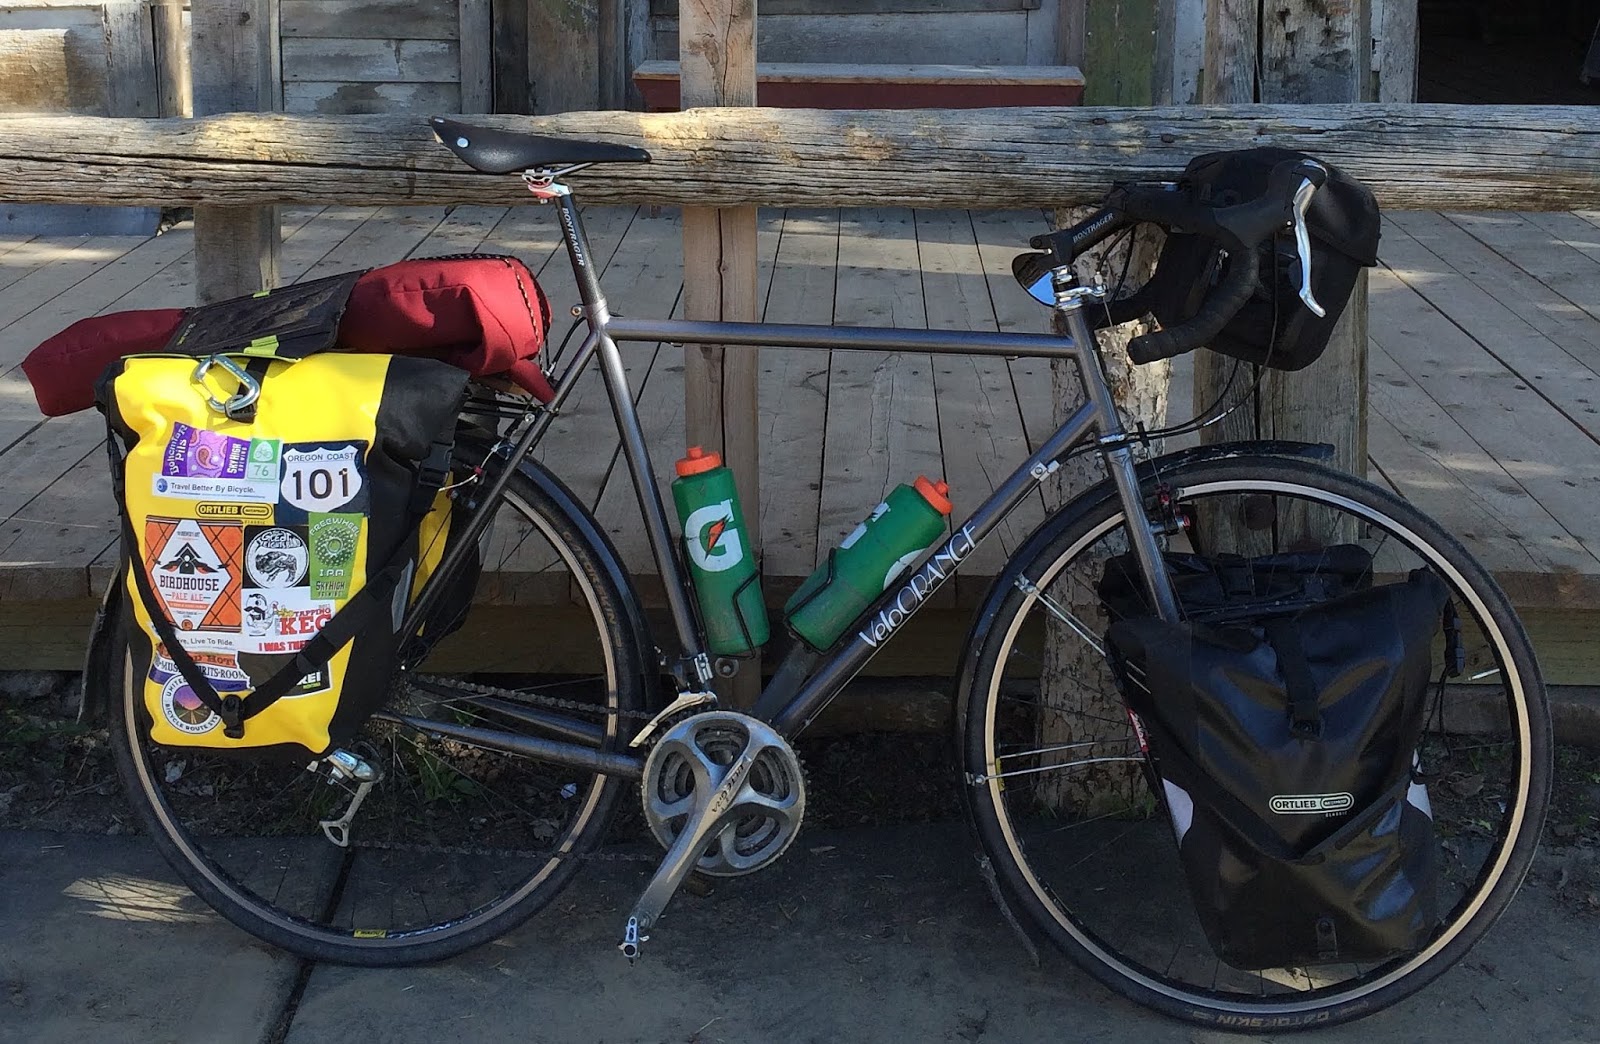
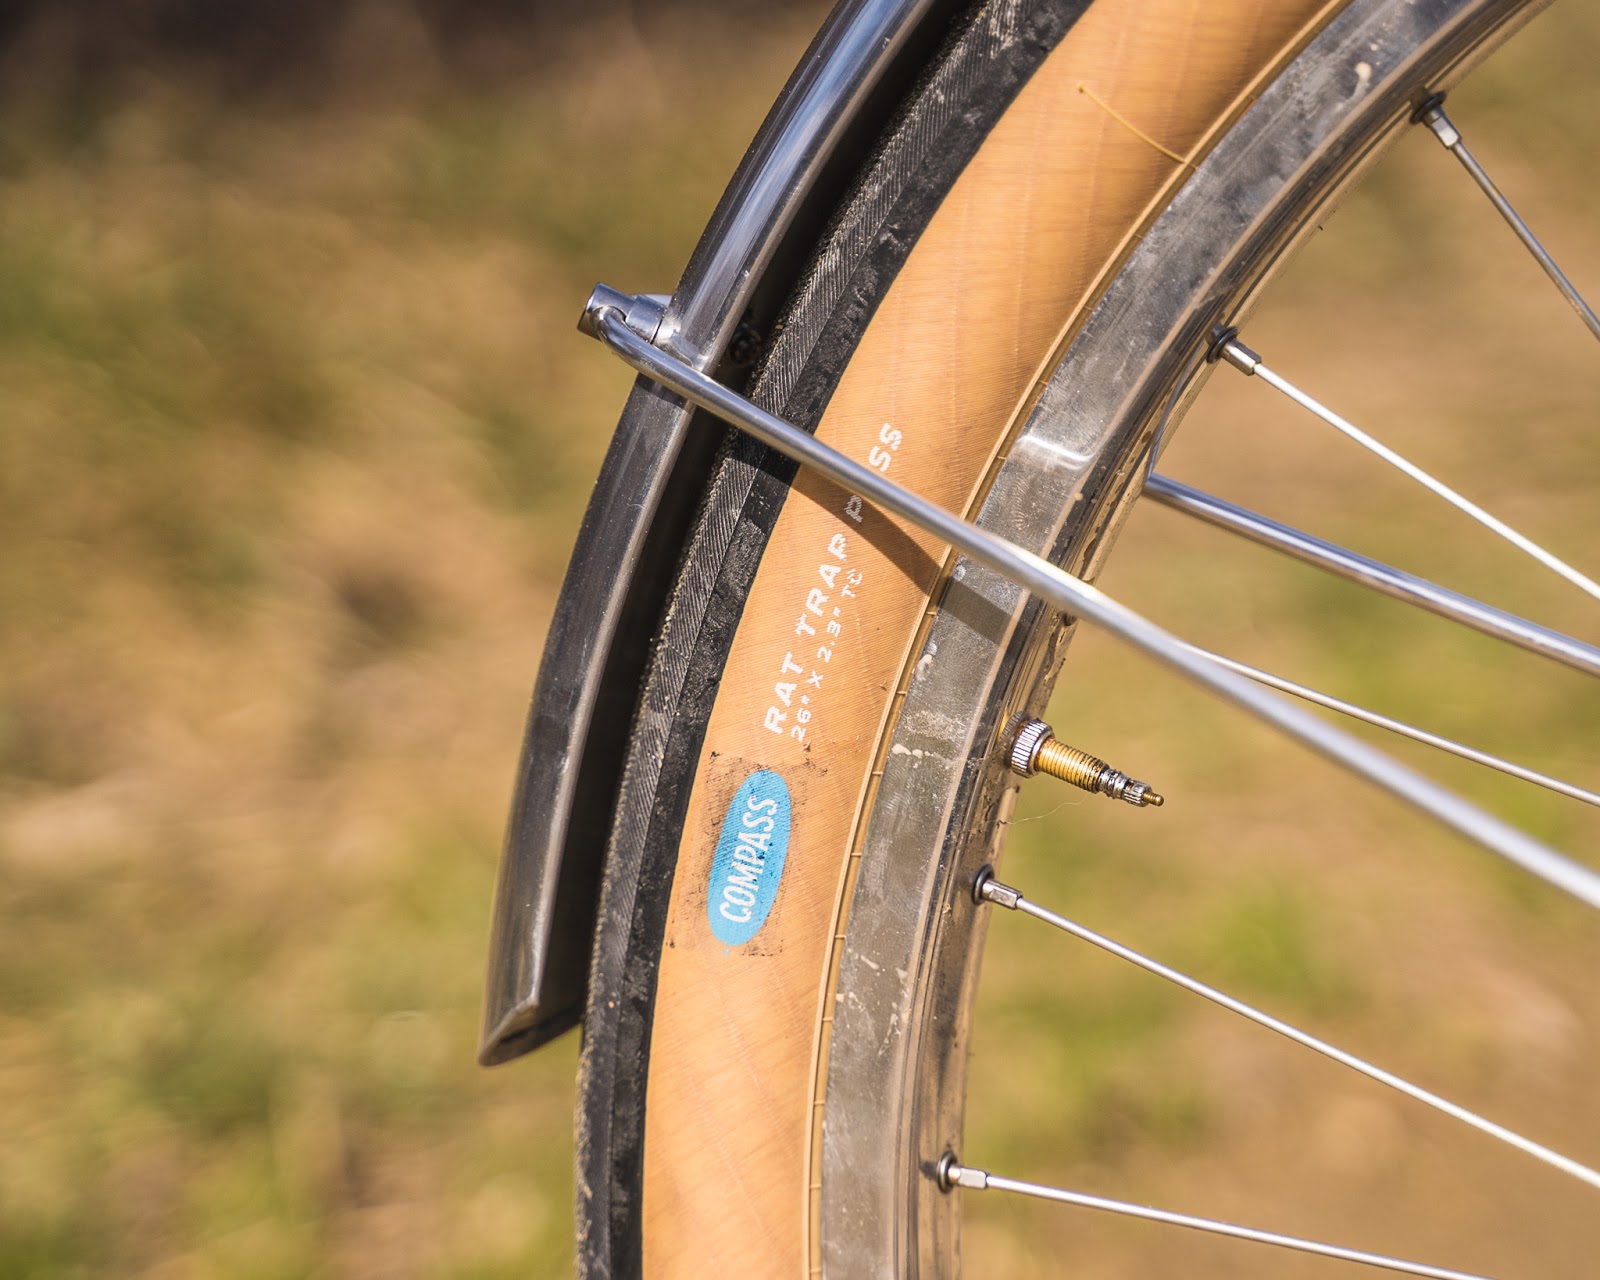
N+1 Cycle in London, ON together. They contribute to a small and awesome cycling community in the city, running taster overnighters for beginners, and generally supporting people on their forays into the world of cycle touring. This was a trip among friends. The COLT stands for Central Ontario Loop Trail, and is a 400ish km loop that lies in between Algonquin Park and Lake Ontario. A series of old back roads, rail trails, ATV and snowmobiling tracks, it was a proposed Tourism Ontario initiative back in the day, but was never developed. There are already a few great resources detailing the loop out there, including write-ups on Bikepacking.com and Bikepack Canada. These blog posts document journeys ridden on either fat bike rigs and/or plus sized tires. 2 of us had 26er 2.1” mountain bike tires, and the rest of us sported 650b wheels with tires ranging from 42-48mm on vintage touring bikes outfitted as best as possible for the task. Jason and Dickson were both riding Wake Robins, N+1’s very own handmade steel bicycle frames. I had the pleasure of riding a Velo Orange Polyvalent from the N+1 showroom, more on that later. We were a group of 8. Jason and Dickson from N+1, friends Mitch, Marc, Wyatt, Nate and Jay (brothers), and myself.

Day 1 - Ganaraska Forest to Presqu’ile Provincial Park (90kms)

We started in Ganaraska Forest, which I have since learned is home to one of only three IMBA Canada designated ‘EPIC’ Mountain Bike Trails (Paul’s Dirty Enduro), and certainly the only one in Ontario. Pretty cool! After an early 3 hour drive from London, we were all gathered in the parking lot of the Forest Centre, where we had got clearance to leave the cars.


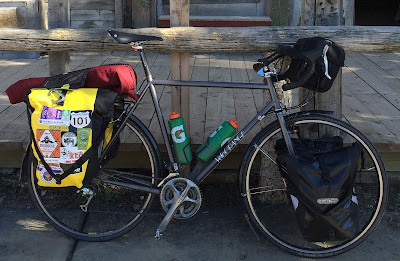
We loaded up the bikes, securing the set ups we would live with for the next 5 days, and set off towards Lake Ontario. Before we would reach the lake, we would endure what could only be described as a rude awakening in the form of a 10km stretch that made us question the entire feasibility of the trip. After taking to some dirt roads, the ‘dirt’ turned to gravel and the gravel turned to a variety of loose stones and gnarly roots. Technical climbs in dense wood had most of us pushing our bikes, with fleeting moments of successful pedaling. Then the sand came, and we were soon hub deep in some thick, sandy double track in direct sun, pushing the pedals and trying to stay vertical. Landings were soft and graceful on the sand, at least. We were on ATV tracks, and every now and then one would whizz by our sorry souls. We would catch our breath on peaks, looking wide eyed at one another. What if the entire loop is like this? How far have we gone? 10kms? Oh dear. We were then presented with a marshy ‘trail’, a long forgotten kilometre stretch that was barely trackable, definitely not rideable, obstructed by fallen tree after fallen tree. We contorted our bodies over and under trees and overgrowth, hauling our bikes along with us, and being feasted upon by carnivorous insects in this shady, unending trench. Morale was tested straight off the bat, to say the least. We finally came across more forgiving gravel trails, and soon enough we arrived at Port Hope, our first town on the shores of Lake Ontario.


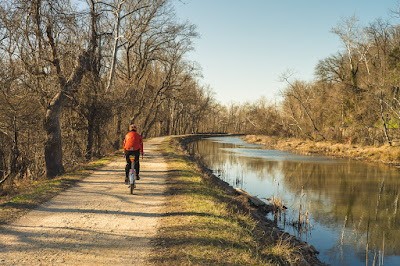
An LCBO (beer!) stop and a glorious visit to Olympus Burger (delicious!) before we continued on mixed roads and trails through pleasant lake side cottage country. Eventually passing by Cobourg, and then Colborne, with short rides along the shore every now and again, we made it to Presqu’ile Provincial Park. All Ontario Parks feel like home to me. The same ‘comfort’ shower stations, picnic tables, and iron fire pits with overhanging grills. We got to setting up camp, cooking our food, and cleaning ourselves up. The moment I realized that Wyatt and I had brought the wrong tent poles for our tent, I had never needed a cold beer so much in my life (I didn’t have one). The camp store only had a giant 10 man tent for sale, and the poles we did bring were for a much, much, smaller tent. Sleeping in the open air is just not an option without netting, for those who have not experienced the hungry winged creatures of North America before.


With a little help from our friends, and strategically arranged guy lines, paracord, tree branches, and tent pegs pulling at the right angles, we had something we could sleep in for the night. Thank god it wasn’t windy. We would revisit the problem tomorrow. I have not yet mentioned that our dear friend Nate had not been doing so hot on this day. He crawled into his tent early on, not to be seen again until morning, poor Nate. We thought it might be heat sickness. One by one, everyone retreated to their tents from the communal fire (I’m pretty sure we had s’mores that night), to sleep off the first day and rest up for tomorrow.

Day 2 - Presqu’ile Provincial Park to Marmora (70kms)

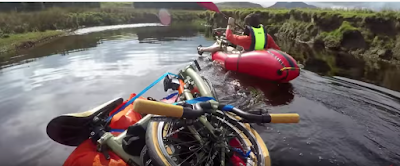
We woke to a sunny morning on Lake Ontario. The droopy tent survived the night, and after some camp breakfast we were ready to hit the trails. Nate did not feel better and decided that he didn’t want to risk continuing with us and needing to bail out in a more remote area. We were all sad to see Nate go, but he did loan us his tent, so that was our tent problem solved, thanks Nate. Today we would see rail trails galore, some bits of the Trans Canada Trail, and our first introduction to the Old Hastings Colonization Road. Our use of this Hastings County Trail is the biggest difference between our route and the route that Miles Arbour first outlined on Bikepacking.com. This day was full of crossing expanses of indeterminately deep water, the kind you can’t bike through.


We were stopping, some were changing shoes, and then pushing through the water. Saving the cycling shoes from a watery state by taking them on and off got old, fast. Some surrendered them completely, while others opted to ride sections in water shoes (Dad-level Keens for me), or even Crocs. We weren’t all clipless folks either, certain dirtbags among us were sporting Vans and Converse on this trip. There were countless water-filled craters in between the big‘uns and along one muddy stretch of canal system the meandering and circumventing became trance-like. We stopped canal-side for a foot wash and a fender scrape (for those who had them). Nate texted us, through intermittent service, reporting that it was absolutely pouring at Presqu’ile. At one point, Jason had a great launch over the handlebars when his front pannier caught a ridge while navigating around one of these puddles, leaving a near-perfect imprint of the brim of his cap in the ground. No one actually witnessed how this happened. Thank goodness for that helmet.


We were tired when we reached the vista at Marmora Mine. We picked up food in Marmora before heading to our campsite. The LCBO (Ontario Liquor store) was closed by the time we arrived so we were in for another dry night. But not that kind of dry--by now the rain that Nate had warned of had caught up with us and it was a drizzly old evening. Once we got to the Heritage Trail Campground, we set up a tarp to cook and congregate under while it rained. Some of us though, went straight to sleep. This was unlike any trip we had done together, a lot less booze, and a lot less campsite leisure time, so far.

Day 3 - Marmora to Bancroft (88kms)

Camp coffee and fuel had us in good spirits and ready to take on the day. The stretch between Marmora and Bancroft, we knew, would be the day with the least amenities (almost none). We stocked up for the day in Marmora and made sure to fill all water vessels.


We continued on the Hastings Heritage Trail, and old Canadian logging roads that would take us the furthest north we would reach on the trip. The puddle crossings continued and the roads seemed somehow rougher, and less traversed, carved out by old logging activity a long time ago. We passed through the famous ghost town of Glanmire, an old settlement existing from between 1856 to the 1950s. An earlier version of the route had us wild camping here at what used to be called Jelly Rapids on night two, a push we would not have had in us yesterday. At one point we came to a crossroads with a neat stone house with the name ‘Hogan’s Hotel’, an old hotel built around 1860, and now a private residence.


It turned out that the residents were friendly, as they let us refill our bottles with their hose. We stopped here long enough to lay out our damp tents in the sun, and left when it began to drizzle. Running out of water is always a little stressful, and during this hot and humid stretch some of us did. Although we were in a relatively safe situation, and had just enough water to share, it still felt a little dire at times. We avoided ‘hangry’ territory by reminding each other to eat (sometimes too late). Turns out a peanut butter sandwich can save a boy’s life (special thanks to the only parent on the trip). In the last push to Bancroft, I distinctly remember crying out “I’m hitting a wall!” while wearily continuing to push my pedals as I fell to the back. While we each took turns having our hardest days, this was definitely mine.


When we got to Bancroft we went straight to the grocery store, with the LCBO closing in minutes. Another beerless night seemed cruel. Mitch and Wyatt were determined to beat closing time. The LCBO sat on a hill, looking like a beacon at the top. With the low sun hanging just beyond, I followed, cheering after them as they sprinted up to the shop. We did make it, and we delivered cold beers for all that night. What a feeling. The park owner was friendly and welcoming at the quaint and lovely Riverbend Trailer Park. The tent pitches were right on the riverbank, and we had it all to ourselves. We swam to wash away the day. The shower and bathroom facilities were especially cute, channelling a Grandma’s basement aesthetic. It was a crisp and starry night, free of light pollution. We all marveled at the trip thus far, and the state of our bodies, around the fire and into the evening.

Day 4 - Bancroft to Burnt River (115kms)

We woke up to enjoy a sunny breakfast while packing up camp.


Leaving Bancroft we were presented with our first considerable section of tarmac. We hadn’t endured much climbing yet, and we were met with long rolling hills surrounded by rocky Canadian Shield. It felt weird to ride in a straight line again, following a wheel, taking turns on the front, and communicating about speed. On one lively descent, Mitch’s back tire wall blew. It turns out it had been discreetly rubbing away on his brake. With a loud bang and some adrenaline bike handling that saved his life, we were road-side. Thankfully touring veteran Jay had the foresight to pack an extra tire. We had earned ourselves a food break, and stopped at a place called The South Algonquin Diner. We ate ourselves full and felt it on the remaining climbs.


It had been raining on and off at this point, and we were dreaming of flat ground. After about 50kms of road we were relieved to join up with the IB&O Rail Trail (Irondale, Bancroft and Ottawa Railway). I realize that I haven’t really mentioned the bugs. I think this is because they were such a constant and anyone familiar with this part of the world already understands. At any given time you can rightfully imagine a swarm of black flies and deer flies drafting just behind your back as you cycle, waiting for you to stop or even just slow down. We were all bitten, and gleaming with a layered mix of bug spray, sunscreen, and sweat. We discovered a pretty spectacular waterfall just to the side of the trail. We climbed down for a scenic snack before plodding on.


The trail led us to Gooderham, a nice little town whose local library washroom made a good pitstop. We were not done climbing. The sun was out and we came across some pretty relentless sandy rollers that had us sweaty and breathless.


We went through what Jason had marked on the map as potential Crown Land for wild camping but showers were calling us. The trail took us past Burnt River and right to our campground for the night. Log Chateau Park was probably the most luxurious place we stayed, they had a pool, and really nice showering facilities. We cracked a tall can and gathered around the fire one last time, recounting the events of the last few days.

Day 5 - Burnt River to Ganaraska Forest (75kms)

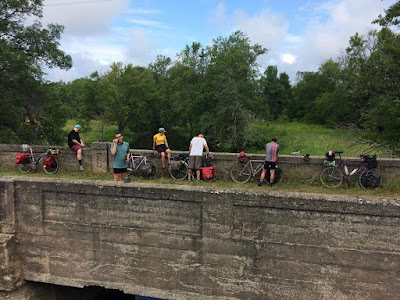
After a good night’s rest we had a relaxed morning. We geared up for one last day in the saddle, it was kind of hard to believe. We headed back out on the Victoria Rail Trail southbound. It wasn’t long until we were alongside Cameron Lake, a picture perfect example of the many beautiful lakes in the Kawartha area. At Fenelon Falls, we stopped for pizza and ice cream at a place called Slices ‘n Scoops. We lounged on the grass near the lock system there, watching different boats move through.


It is true that you can ask to camp at lockstations, at the discretion of the lock master, for a fiver. It was sporadically sunny, with some mean looking clouds never too far away. We crossed the bridge over the Trent-Severn Waterway, which we would continue to follow. There was a plea (demand) for an emergency pharmacy stop to buy painkillers. Some of us were feeling the accumulation of the five days. We spent most of the day on the Victoria Rail Trail, passing through more cottage country and waterfront property.


We hit some pretty chewed up ATV track as we entered back into the outskirts of Ganaraska Forest. It was the final push to the end, and we’d get one last taste of COLT grit. Suddenly day one’s legendary first 10kms came back to us with a shudder. It never got quite that bad, but we did celebrate that we had not decided to reverse the loop as that gnarly chunk would have destroyed us now. After zipping along some country lanes back towards the Forest Centre, our tuckered bodies rolled into the parking lot where we had left the cars 5 days earlier. Climbing off of the bikes knowing we had completed what we set out to do was marvelous. Sitting around and licking our wounds, a young man in a pickup truck drove up to us waving. He stopped to chat saying that he was glad to see us as he had been watching the cars for several days, worried that he might need to alert the authorities. We were glad he didn’t do that. We secured our filthy bikes to the cars and drove back towards civilization to share the glory of the COLT.


Post trip

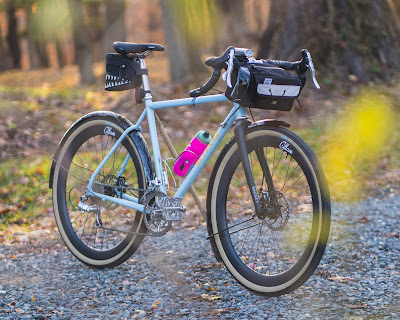
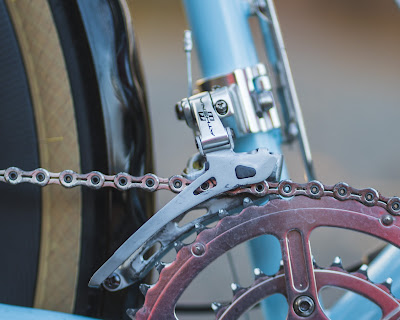
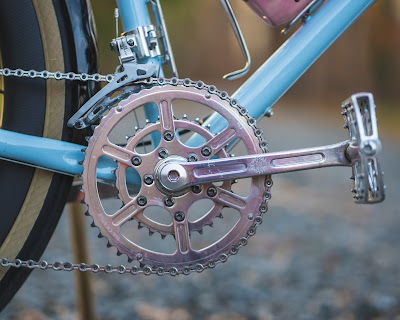
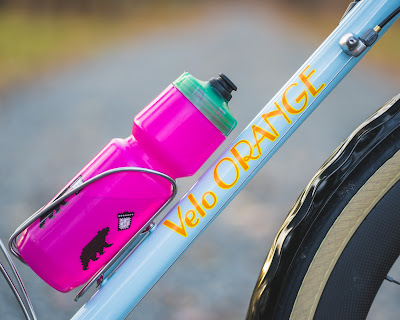
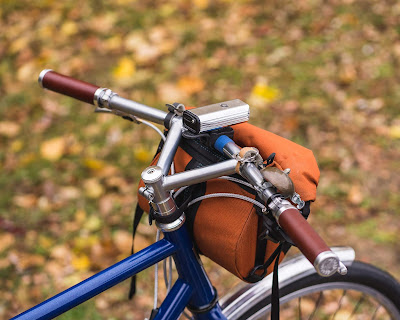
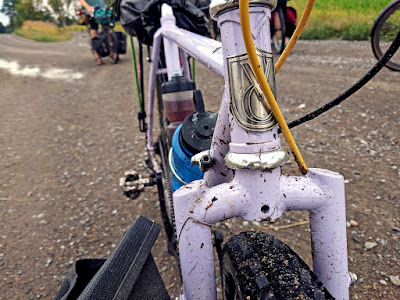
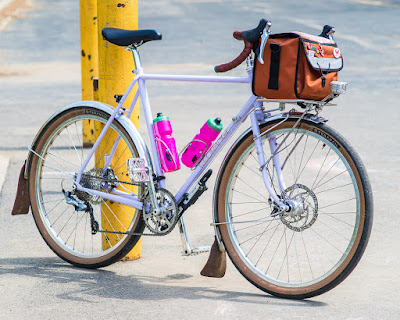
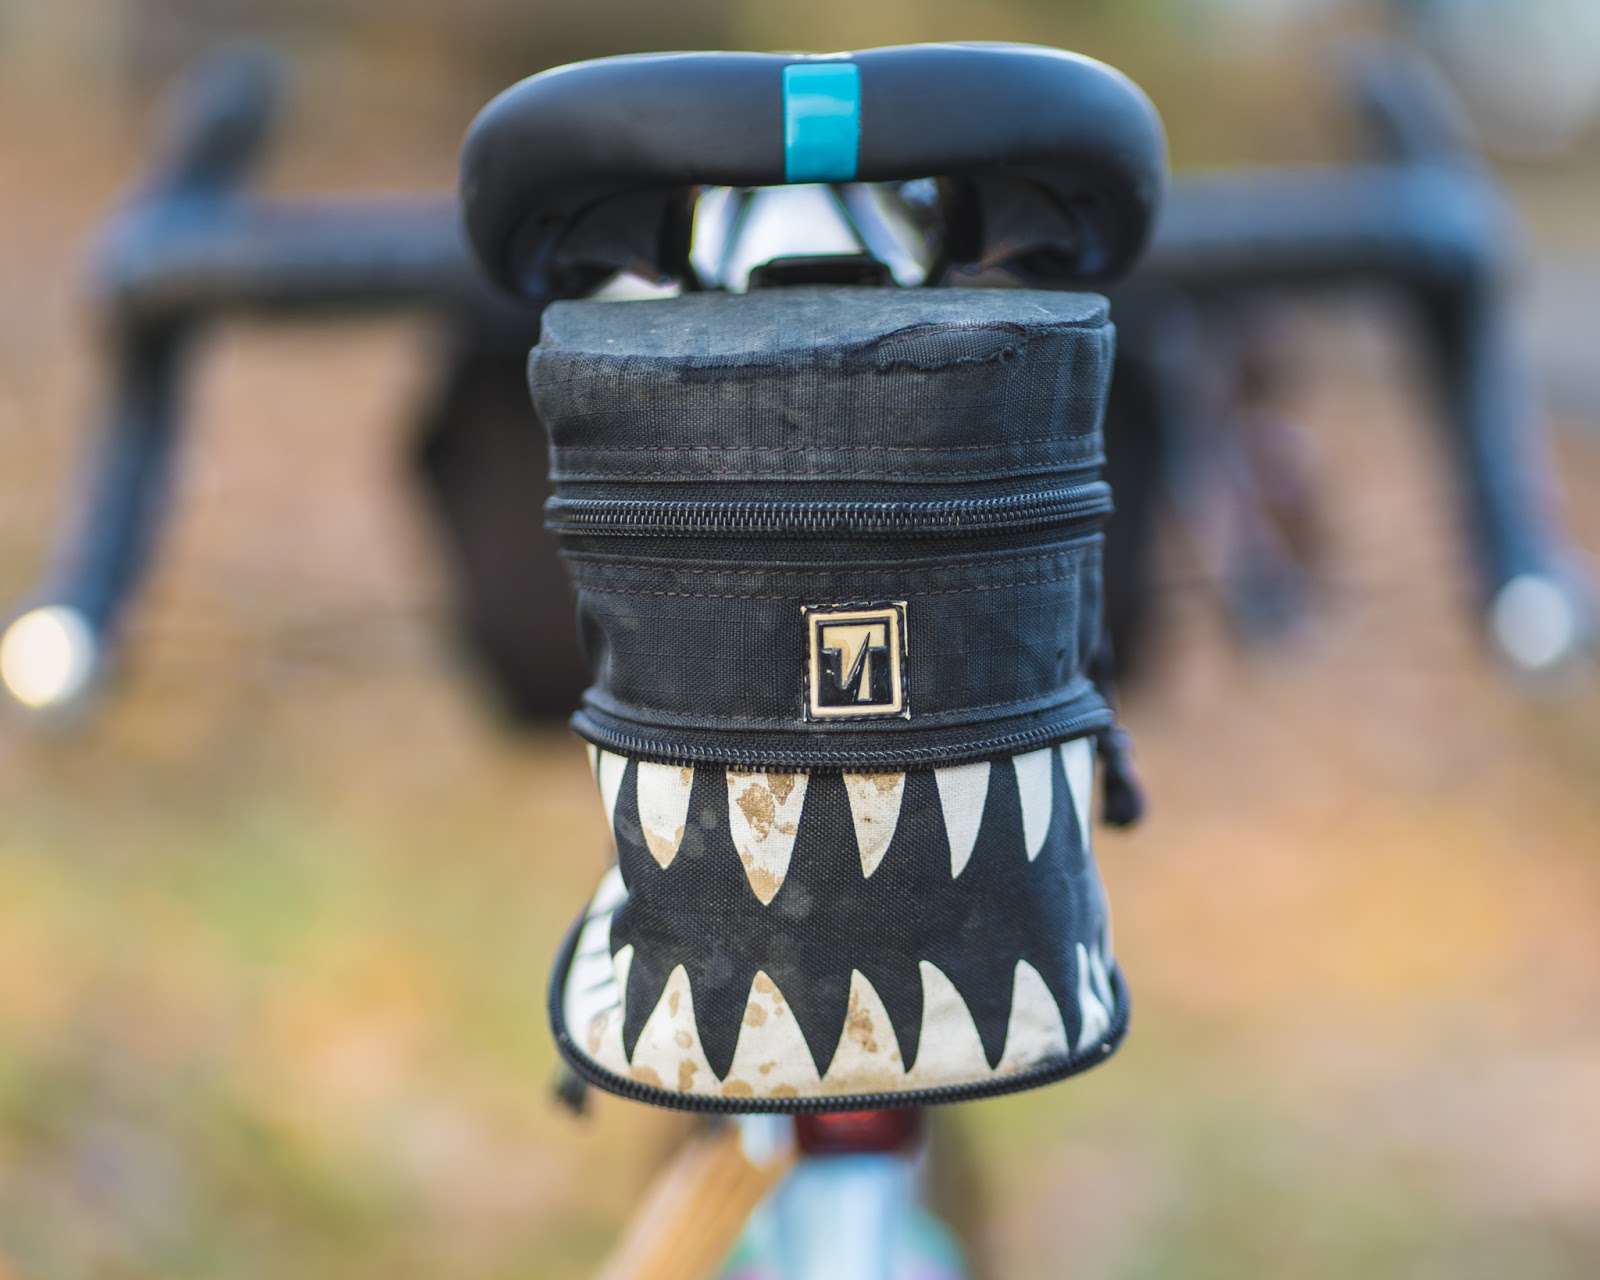
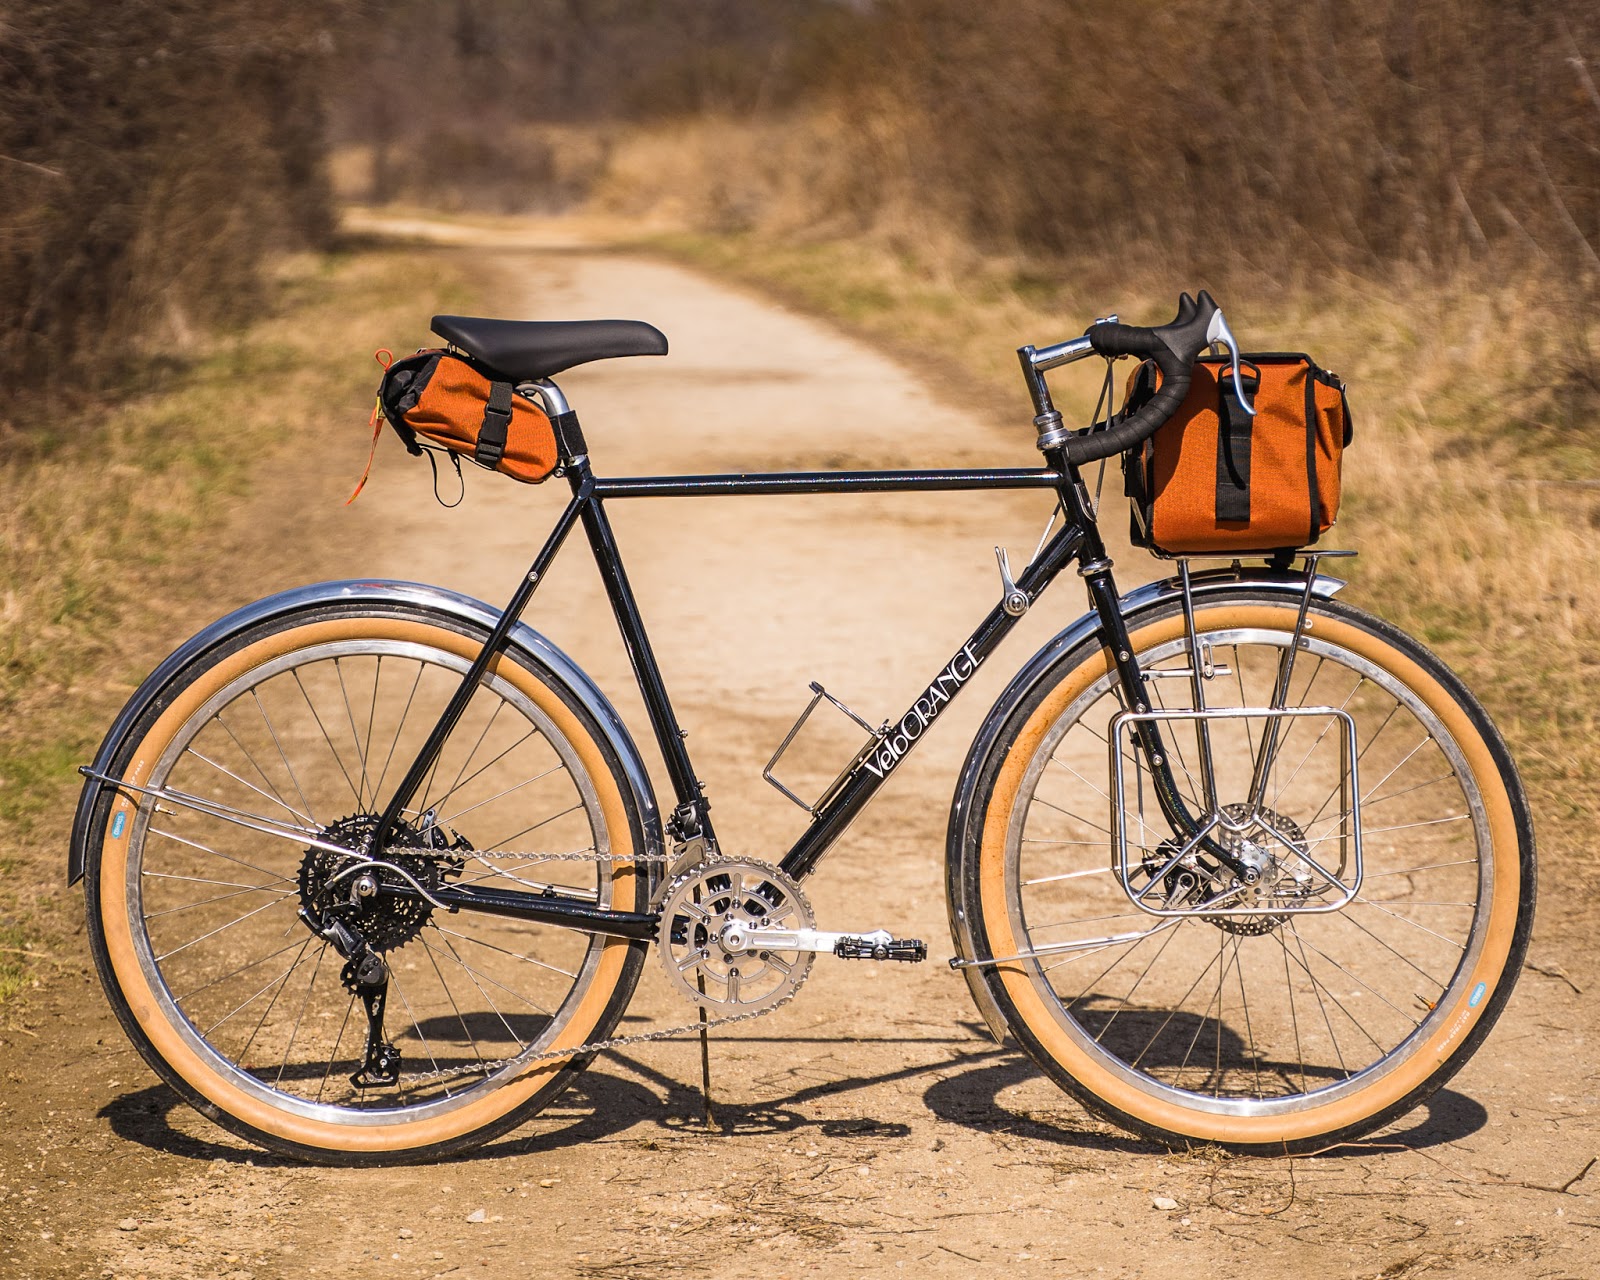
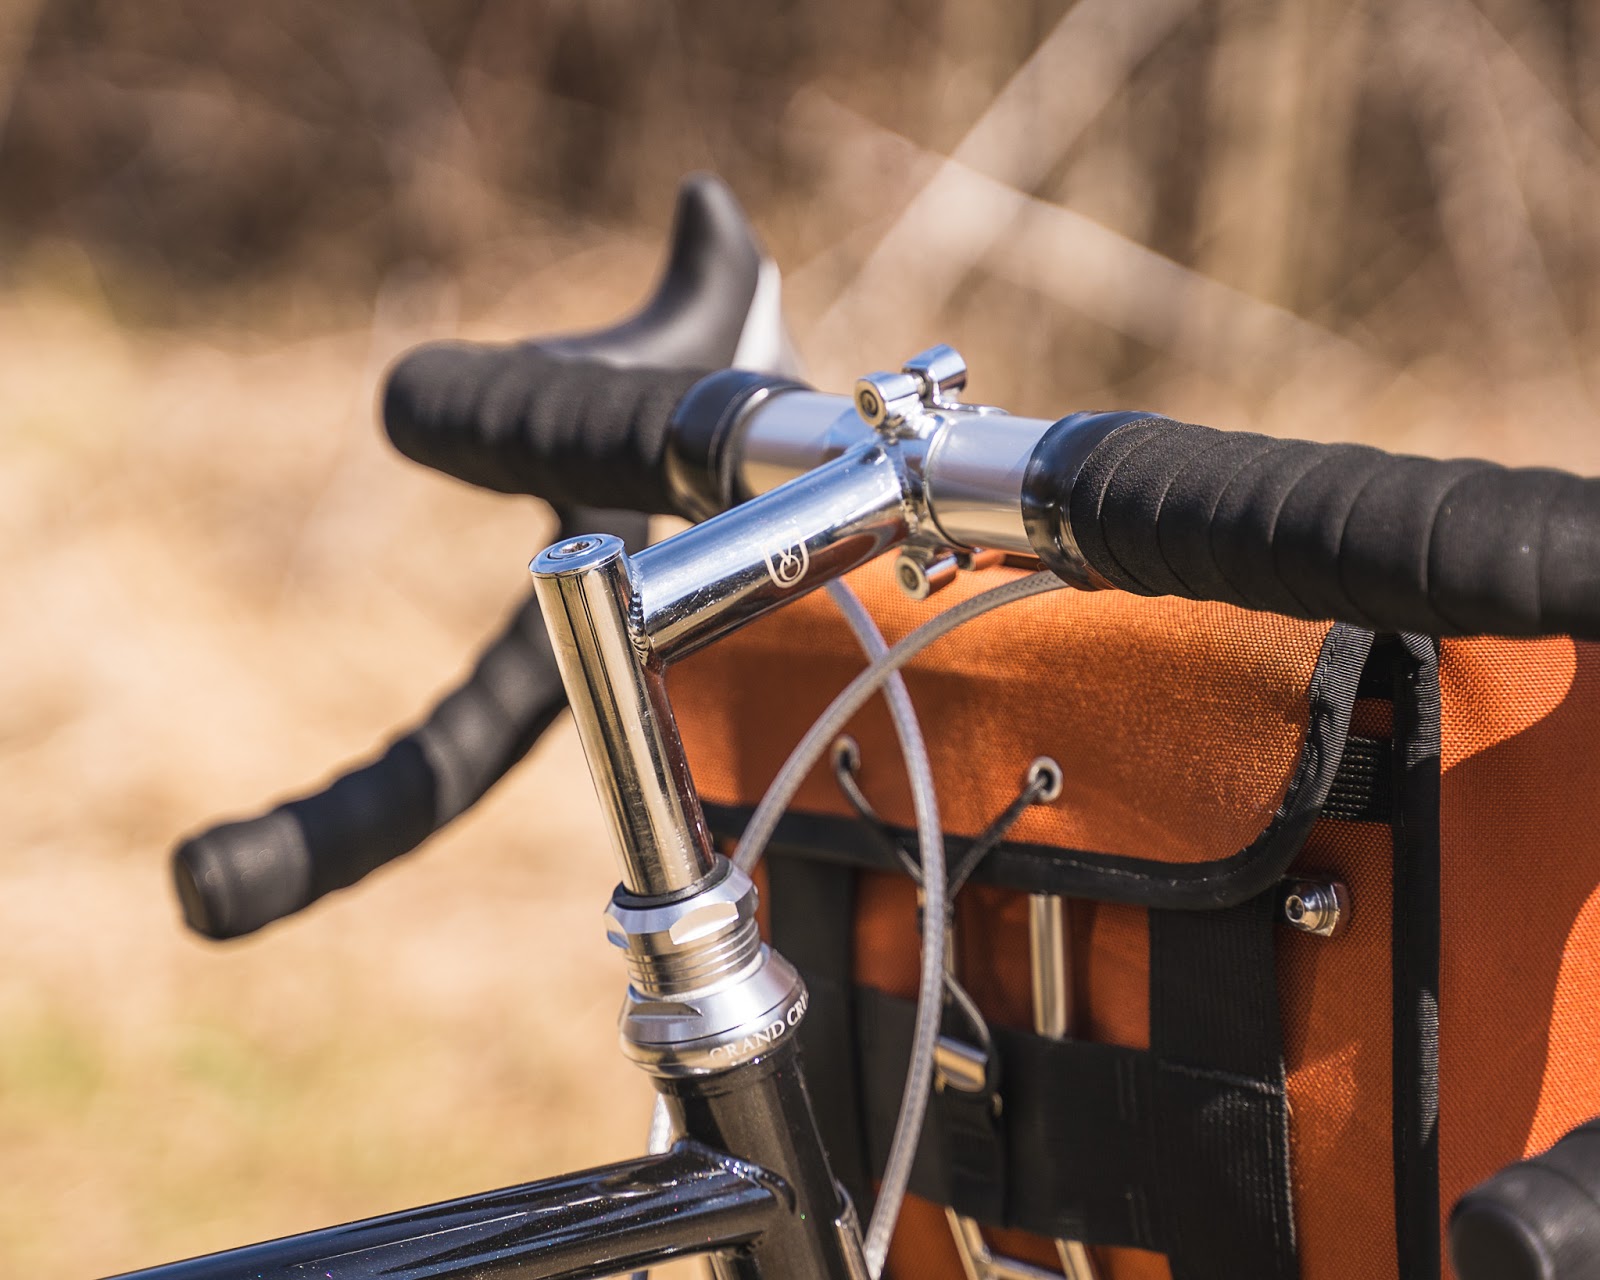
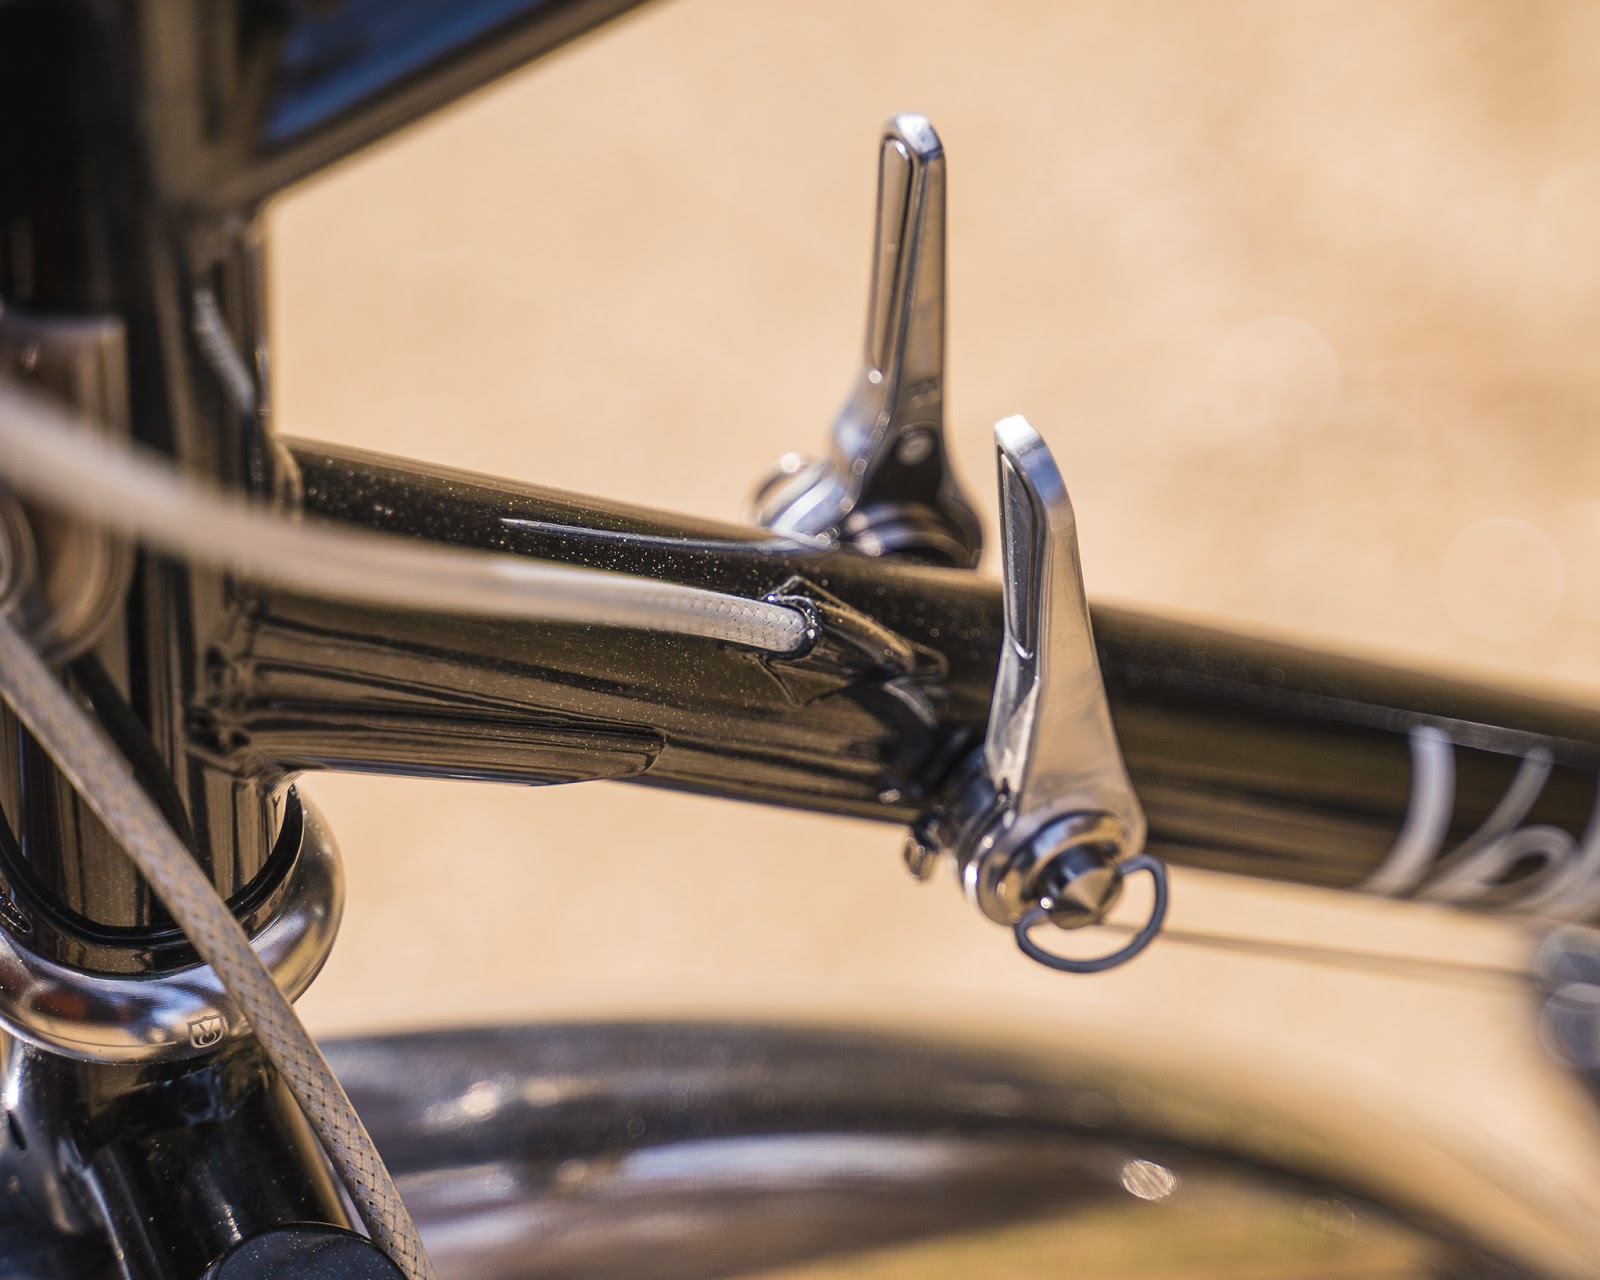
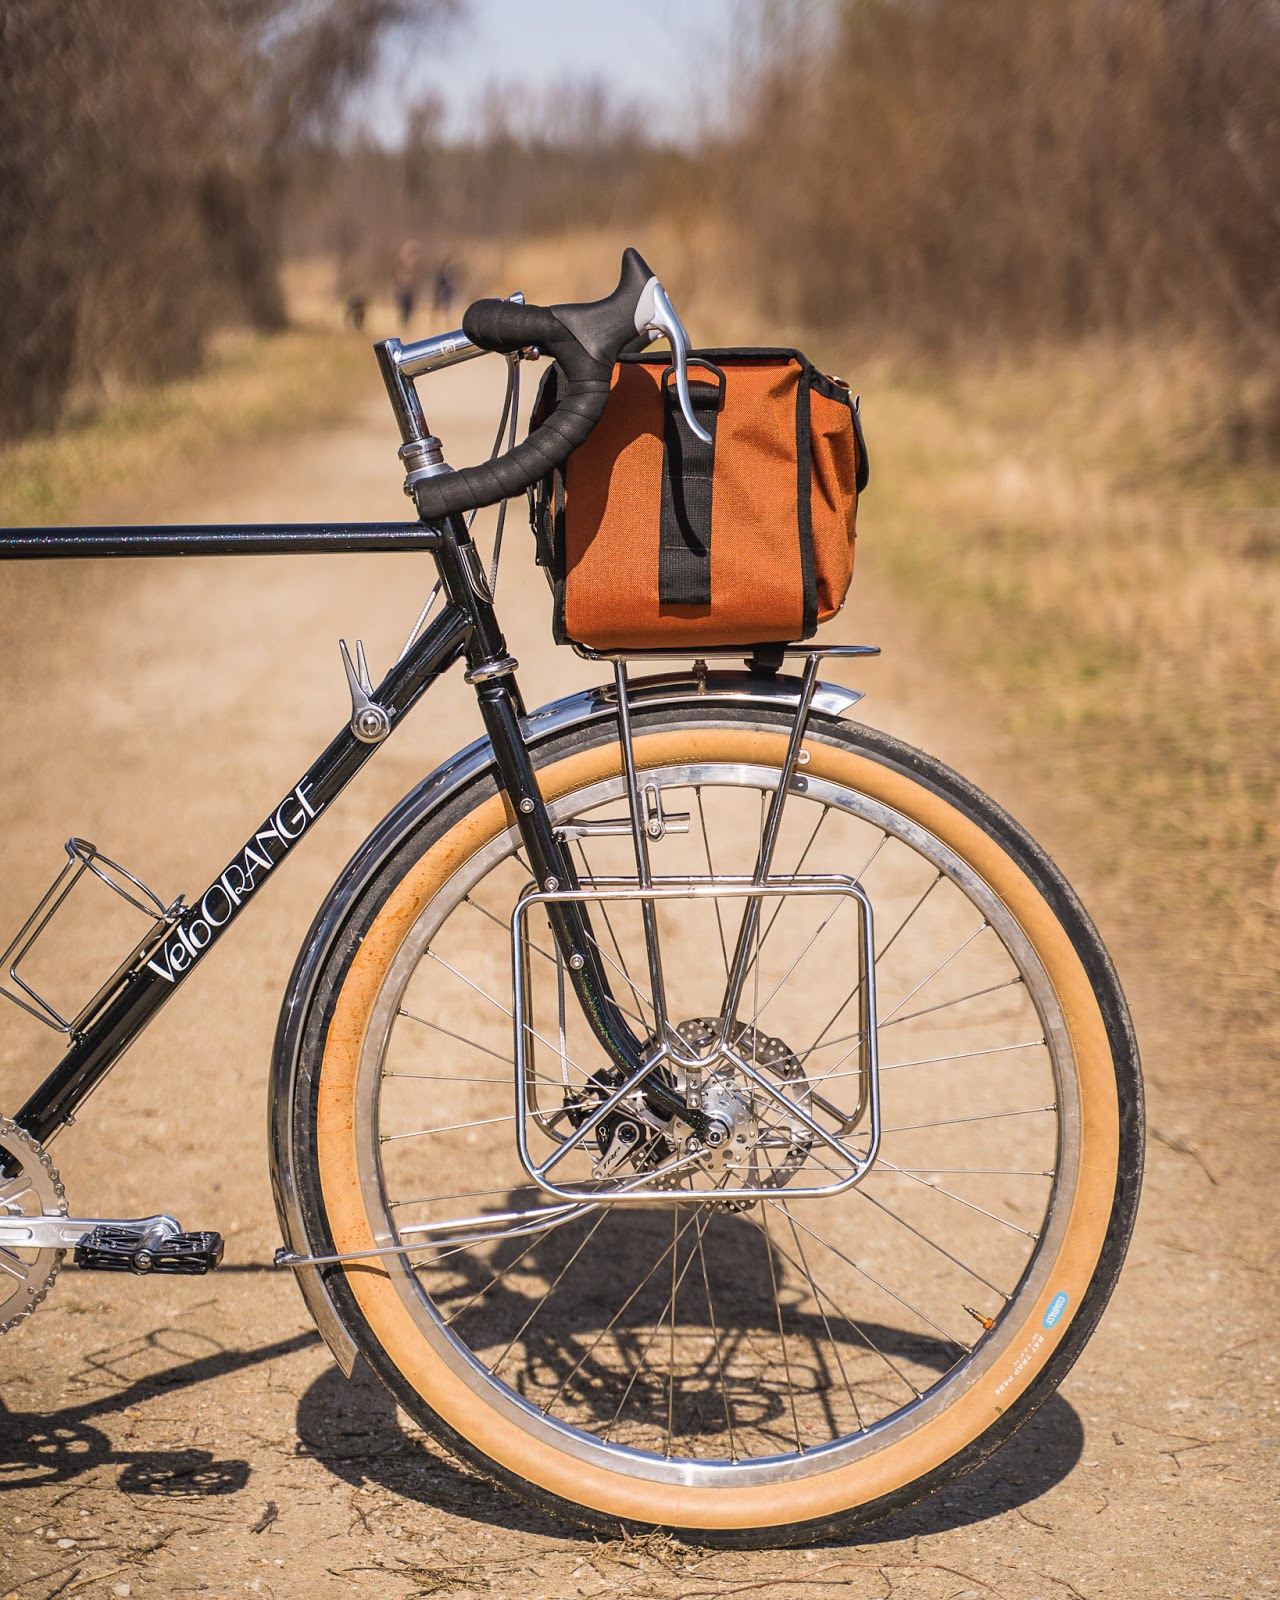
The COLT felt like my biggest feat on a bicycle when I was riding it. It certainly created some unforgettable memories for all of us, and binded us as a riding group. I would definitely do it all again, though I think many would opt for an extra day or two in there to get it done. What I wouldn’t change though is the bike that I was riding. It was quite a way to get acquainted with a bike. Knowing going into it that most people before us had used fat bikes, I must admit, I had thought to myself--it can’t be that bad. On reflection, I can totally see that a fat bike would have been a solid and appropriate choice. The VO Polyvalent that N+1 Cycle had built up for the trip was a versatile and fun bike for the job.


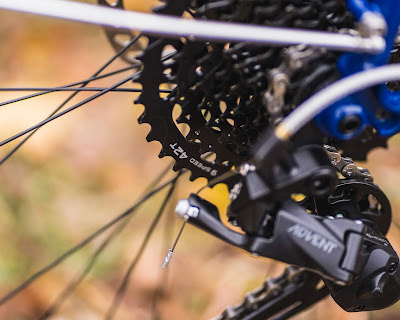
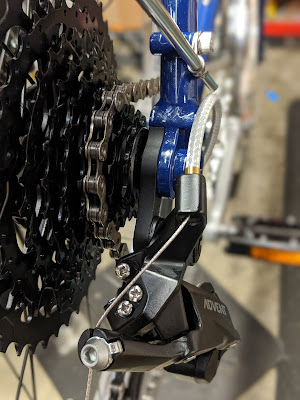
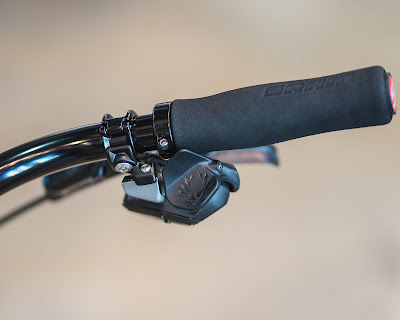
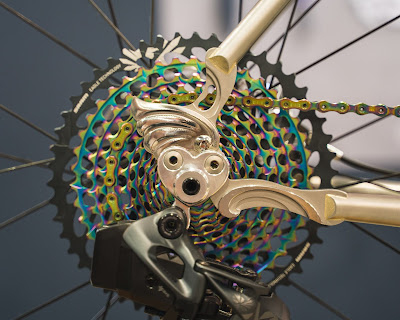
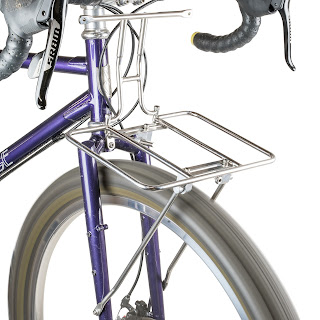
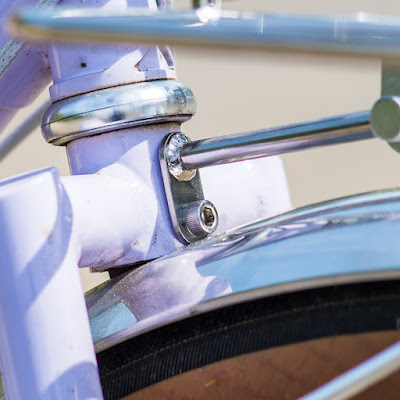
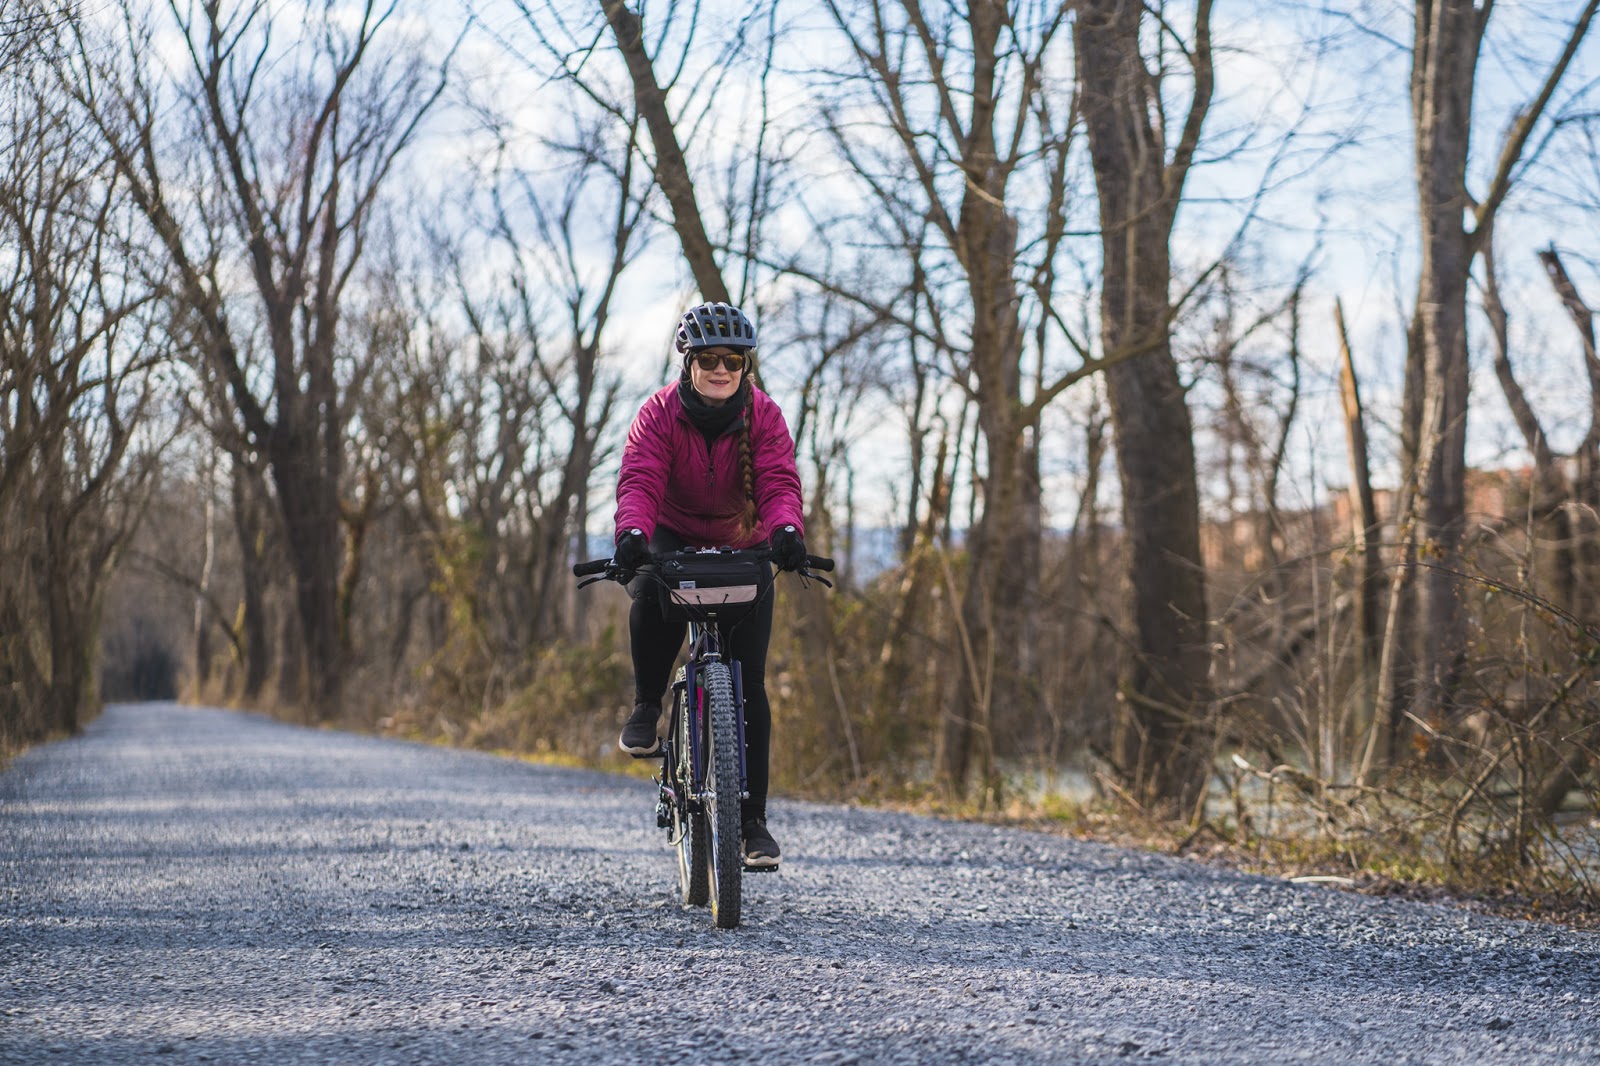
With a 1x SRAM system and 26ers with 2.1” Maxxis Crossmarks I was able to roll over anything. I’m a wee lass, and even with the bike fully loaded, I still felt like I had a good degree of handling control. It would have been nice to have a bit less stuff, but then comes the old reevaluation of what is necessary and what is comfortable. The Polyvalent has the ability to accommodate any nomadic style you wish to embrace. Bosses and braze-ons for any rack you could want, low riders or cargo cages, full bikepacking gear, or classic touring rigs. I especially appreciate the traditional aesthetic with generous adaptability. I would highly recommend the COLT as a sweet and unique off-road venture in Central Ontario. Regardless, I hope to explore more old Canadian logging roads in the future, and once again look up from my handlebars to find myself in Group of Seven landscape painting territory.


  419 Hits

Flat Pack Racks Arrive!

by Igor


We're pleased to announce that the super adjustable and sturdy Flat Pack Rack is now available! Let's face it, front racks and handlebar bags are the Wild West. There's no convention, rhyme, or reason for braze-on placements let alone glue-ons for carbon forks. We could push another braze-on mounting standard onto the world but, to be honest, I think we're all tired of the "standards" that exist. So we've decided to go with the flow.

Adjustability for the Flat Pack Rack is accomplished by employing sliding stays and darumas to dial in the position and level of the rack. With so many forks out there riddled with eyelets and holes for low-riders and 3-pack mounts, you can choose where the rack will mount.


The platform is known as a “demi-porteur”. Its size is somewhere in between a full Porteur and traditional Randonneur front rack. The main benefit to the demi-porteur style is better stabilization for large Randonneur Handlebar Bags as well as better support for baskets and large, bikepacking bags.

The uprights are removable and can be interchanged between a decaleur receiver for a Randonneur-style handlebar bag and a tombstone loop for a basket or other luggage.


When disassembled, it can fold almost completely flat - which is really useful for travel where space is at a premium. After removing the rack from the bike, I like to leave all the rack parts attached to one another, just simply folded and then re-tightened as not to lose anything in transit.

The Flat Pack Rack mounts to the fork crown using this little do-dad we call a Foot. This beefy mount sits flat against the fork crown and is also mounted to a daruma-style receiver, so it can slide up or down and in and out depending on your clearance needs.


Oh, and there's also an eyelet on the front of the rack for a light!

Be sure to check out this video outlining some of the key highlights and mounting details of the rack.


  457 Hits

VO Tips for Adding Flair to your Pain Cave

By Jacques


In these challenging times, we have to remember to look after ourselves in both a physical and emotional way. For a lot of riders, being restricted in our outdoor movements has lead to a rise in both baking bread and working out indoors - and we suggest combining the two. Cue the pain cave.


Here at VO, we understand that many are working to improve their half baked indoor situations - we've sold a bread truck's worth of posters recently as proof of this. May we (mais oui) offer some suggestions, à la carte, that you can use as a starter for your best indoor cycling life and help avoid a doughy body that can result from a lack of movement and excess butter.

First key is hydration. Even with using a fan, it will get warm, so you want to ensure that you have lots of liquids nearby to stave off dehydration.


Second is food. Cycling much past a half hour can leave you depleted, energy wise. So make sure to eat at regular intervals to ensure your blood sugar level does not drop too low.


Third is comfort. Make sure your position is dialed in, because you're in it for the long haul. Igor is riding a set of Left Bank Handlebars and Adrian has Nouveau Randonneur Bars.


Finally, style. Being stuck at home is no excuse not to look your best. Accessorize your outfit and your environment to your particular taste.


Remember that even in a pain cave, a fresh loaf of pain de campagne or pain boule will help to keep your spirits from getting crusty. Carbo-load with abandon. No knead to thank us for this, it's the yeast we could do in this time.


  442 Hits

A Message from Velo Orange

Dear Velo Orange Community,

Igor and Adrian here. As the COVID-19 situation develops, we are taking additional safety measures and precautions to protect the wellbeing of our employees, customers, friends, and families. As such, we are temporarily closing the showroom effective today, March 24th. Please do not try to pick up your order here. Even if you're local, we will be shipping all orders. If you're picking up a bike, we can arrange for a social distanced delivery. For customer service questions, please email This email address is being protected from spambots. You need JavaScript enabled to view it. if you're able to, rather than call - this would be our preferred method of communication. While we do not foresee any delays in shipping or customer service, please bear with us as events develop.


We encourage everyone to take proper precautions to safeguard the health of themselves and others. Please follow the guidelines put forth by the CDC as well as those by your local government and municipalities. Practice proper social distancing, wash your hands, avoid sick people, and self-isolate especially if you think you have been exposed to the virus.

As a community we can flatten the curve of COVID-19 cases and come out stronger on the other side.

Thank you as always for your continued support, positivity, and loyalty. We appreciate each and every order that has come through during our virtual garage sale and 20% off promo, and are grateful for the adaptability of our amazing customers during these changing times. We're a small business and rely on the support of people like you - thank you. If you have any questions or concerns, please reach out.

Igor Shteynbuk and Adrian Nelson,
Owners of Velo Orange

  456 Hits

Headset Spacers - Cycling's Equivalent to a Belt?

By Scott

In a post a while back about the little details, I outlined some things about our bikes/frames that can get glossed over by the first look, but most certainly deserve a second or even third glance/inspection to understand the level of work that goes into them. Belts are similar in the clothing world, that they are useful, can add an interesting accent to your outfit, but are often over looked. I think headset spacers fall into a similar category in the cycling world of being an overlooked, but essential way to achieve a cohesive aesthetic.


My interest in spacers can be a little awkward when I talk to other cyclists. When I ask, "what's your favorite headset spacer?" most people slowly back away while trying to maintain eye contact with me. (odd, huh?)


With some of our new frames, headset spacers have become a more interesting aspect to the bike. With the Neutrino frame as a prime example, the long steerer tube can result in a greater than normal spacer stack. Due to this, we now have 1 1/8" 20 mm thick alloy spacers (black and silver thank you). The 20 mm thickness/height helps out on builds like this. Having 4 x 5mm thick spacers does the same job, but the bumps between spacers can be a bit jarring from a cosmetic standpoint.


Now if you're looking for something for the classic bike in your life, the brass spacers from Blue Lug add some interesting mixes of color to the headset area and the patina that will develop from the road will bring back memories in years to come. They even have a brass top cap for your threadless headset.


Finally, coming back to VO product #1, the bell spacer - the first product offered under the Velo Orange brand back in 2006. With sizes available to fit on 1" and 1 1/8" headsets, it makes mounting a bell easy. But if we think a little out of the box, you can use the M5 threaded section on the mount to attach something like our Rack to Light Bracket to it as well, if you want to have a front dynamo light. (Shout out to Jim S for this suggestion and photo)

Where do headset spacers fit in your world? Something to obsess over or just part of the background of cycling?


  458 Hits

Spring Garage Sale Postponed


We have decided to postpone the Velo Orange garage sale initially scheduled for March 21st. We do this with an abundance of caution in order to prevent further spread of COVID-19. Preventative measures are made more important with news of the first identified patient in Anne Arundel County, MD, where our Annapolis headquarters is located. The impact of the virus on our staff and surrounding community has been limited, but we believe postponing the sale is the best decision, especially for folks planning to travel from out of state. We have not set a new date for the garage sale, but keep an eye on your email, the Velo Orange blog, and social networks for updates.


  454 Hits

How to Wrap Your Crazy Bars

by Igor

The Crazy Bar has really become such a quintessential "Alt-Bar" due to their construction, shape, adaptability, and function. Adrian recently built up her Piolet (details and photos in another upcoming post) and opted to use them in leu of her go-to drop bar, the Nouveau Randonneur. She wanted a different position that would be more nimble for off-road riding namely for single and double track. So while we were getting everything buttoned up and going back and forth about the pros and cons of different wraps/grips, I thought it would be a good idea to do a how-to as well as some of the ones we've done!

If this is your first time reading about the Crazy Bars, here is a primer:
These bars are intended for touring on paved and unpaved roads, single and double track, gravel and crushed limestone, and everything in between. The main, swept back section provides good control on rough and tumble surfaces, while the the bullhorn section offers a streamlined position for smoother roads and headwinds. The center portion replicates the top of a drop bar, and placing your hands at the junctions is not unlike riding on the hoods. The grip area is 22.2 for mtb and city components and the horns are 23.8 and accept bar-end shifters.Here is how you can do my preferred arrangement: a seamless wrap that begins at the horns and ends at the stem, covering the extensions and tops. I then use our Black Cork Grips on the swept back portions. Just like there are different drop bar wrapping techniques, this is one.

Start wrapping from the horns just like you would on the drops. When you get to the junction, wrap under and around to the back of the bar.


 One more wrap back over.


And then continue wrapping the flat portion of the bars. Finish wrapping the bars as you would a drop bar by the stem.


Here's the final result!


In the over 6 years we've carried the Crazy Bars, we've seen all manner of builds with the Crazy Bars being a focal point. Here's a gallery of some other notable wrap jobs, each with their own flair.

Here's a set I saw in France while at a rest stop during the last year's Anjou Velo Vintage ride!


Here's a simple horn wrap if you don't plan on using the tops, or want to keep them clean for accessories.


When we first started testing the Camargue and Crazy Bars, Scott was using bar-end shifters. He had them arranged upside-down to what you would expect as a bar-end on drop bars, but you got used to it really quickly.


Love the super contrasty tape and natural wrap on the tops. Plus the picture is great.

https://www.instagram.com/p/B5VXV3ihShs/
No picture of the wrap job, but Pierre's Space Horse with Crazy Bars is super!


You can also use long track grips on the horns! Note the Mini-Rando Bag strapped to the horns for off-road stability.


Bar wrap is cheap and easy, so try some different colors to find your Crazy Bar style.


  618 Hits

Touring Tips from VO Brain Trust

by The VO Brain Trust

So, spring is here (or at least you have an idea that it going to show up someday) and you're itching to get out for a little tour. Nothing huge, maybe no Trans Am for you this year, but a nice tour of an area that you have eyed for a while. All of us at VO have done some touring over the years and we wanted to help with the prep for your trip by offering some tips/advice to make it more enjoyable.

Planning


Start your route planning with either a big paper map or looking at the biggest space on google maps. Figure out where you'd like to go - are there hot springs or some sort of natural sights you want to see? Mark them all on the map and then you can use Google maps to link them using the bicycling route mode. It's really handy as you can break it down by the distance you want to cover per day, and it gives you a rough elevation profile, so you can see how hilly it is. The other aspect to this is to have a Plan B. This can mean a different way to get from A to B, even using public transit to get around. Unless your time is unlimited, and, depending on tour length, you might want to build in a one to three day buffer. You might need some extra rest, have a major mechanical, sustain an injury, or simply come across a cool town or park you'd like more time to explore.


Weight
When measured at the Adventure Cycling offices in Missoula, Montana, my fully loaded bike for a cross-country tour, weighed in at about 85 pounds. I'm also the guy who brought a banjo.
I don't want to belittle any of the so-called "weight weenies" out there, but, in my opinion, touring is not the time to worry about every little added ounce. Trust me, two or three pounds is not going to matter much when you are chugging your way along the trail. I would much rather have a jug of water strapped on my rack than insignificant weight savings. Weight doesn't matter if you can't hydrate! Bring the essentials but remember: you will likely find towns inhabited by other humans who share the same basic needs for food, clothing, and hygiene. This all being said, pack appropriately for the length and type of tour.

One way to get a light touring bike is to go on a "credit card" tour, dining out and staying in cozy B&Bs along the way.

Basic Fix-it Knowledge

(Can you ever have too many tubes?)
Speaking of gearing up, the classic cliche applies: expect the unexpected. More importantly, be prepared. It's best to have some basic mechanical knowledge of the workings of your bicycle. It is a good idea to take a couple basic mechanic courses at your local shop to get more familiar with your bike. Be sure to carry tools and spare parts such as: tubes, tire levers, pump (do not rely on CO2 canisters), multi-tool, chain tool + quick links, small crescent wrench, and a couple spare screws for racks/fenders.

Try before you leave


One thing that a lot of folks forget to do is test everything before they leave. If possible, put all your bags and such on the bike, make sure everything fits and is balanced well, and then take it for a ride. An overnight is best, but it doesn't have to be a huge ride either if time is short. But is it very important to go out for a couple hours over similar terrain to where you'll be riding to assess your equipment and gear. Do the bags need to be tightened up? Is my heel clipping the bag? Does a strap need to be cut down? If you're using a tent, put it together and break it down so you know how it all fits together and packs. We have put many a tent together with fading or no light, so practice. Little things like that will save time and frustration and allow you to better understand how your bike feels with weight on it.

Clothing Options

Think about the clothes that you need and if anything can be multi purpose. I have a couple synthetic and mixed textile shirts from Eddie Bauer that are super comfortable on the bike and are great for hopping off the bike and into a restaurant or museum - i.e. blending in. They're also long sleeve, so I can roll them up and down depending on the temperature. Having multi-purpose clothes means you can pack fewer articles which reduces bulk and weight and generally keeps your clothing kit simpler which is always good.

Learn Some Words


There's a big difference between "trinkwasser" and "kein trinkwasser". One will hydrate you, the other may give you diarrhea. 
If you're going to a country where English isn't their first language, learn a few basic words such as hello, goodbye, please, thank you, bathroom, food. Knowing the absolute basics when entering a store or asking someone for help, at least attempting the local language, puts everyone significantly more at ease. It has happened to me many times where if I am having trouble communicating with one person, they will grab someone else and a team effort begins. People are generally very good. In an pinch, charades is pretty universal - you know, rubbing your tummy for food, holding your nether regions and jumping around for bathroom, and folded hands against your head for sleep.

Always Read the Plaque


The mantra “always read the plaque” comes from Roman Mars and the 99% Invisible podcast crew. Keep that in mind as you go from place to place. If you see a plaque, stop and learn something about the history of the landmarks and towns you pass. It’s a great opportunity to soak in the scenery (and take a break from pedaling).

Rely on the Kindness of Strangers

The nomadic nature of your fully loaded bike will undoubtedly draw the attention of others. Embrace the strangers with their questions and offers of hospitality. You never know when you might get a invitation to a meal, an amazing story, or a bag of fresh apples. Locals are a great resource.

Cheap Lodging


Do some research or ask around. Camping is typically the preferred option of bike tourists -- and can be as cheap as free -- but on well-traveled bicycle routes you will often find no shortage of churches, hostels, and even homes welcoming cyclists to stay the night. Shout out to WarmShowers too.

Enjoy the Ride!

Every day on the road will not always be your best day. Touring presents many challenges that cannot be anticipated or covered in one blog post. But there is a reason you decided to go on a bicycle tour, whether it's to challenge yourself, enjoy the scenery, or travel somewhere new. So hang on for the ride and enjoy it while you can.

I'll let Ernest Hemingway close things out:
It is by riding a bicycle that you learn the contours of a country best, since you have to sweat up the hills and coast down them. Thus you remember them as they actually are, while in a motor car only a high hill impresses you, and you have no such accurate remembrance of country you have driven through as you gain by riding a bicycle.


  473 Hits

A Future-Proof Polyvalent Touring Bike with Downtube Shifters

by Igor

This Polyvalent build was a lot of fun. I think this is the quintessential touring bike that straddles old and new, practical and elegant, modern and timeless. There isn't anything particularly special about it, but that's the beauty of this composition. It just works and will be dependable for years and years to come.


Let's begin at the drivetrain and gears. Touring bikes should be geared properly because you're either going to be doing a lot of walking or a lot of coasting. Basically, your setup should be wide enough that you can climb most any hill, but also tall enough that you aren't really running out of gear. So while 1x drivetrains definitely have their place in the bikepacking and mountain biking world, I think in traditional touring and Sport Touring, the 2x compact/subcompact really is king.


Most recently, I've been working on builds that are fairly complicated. Well, not as complex as triathlon and full suspension bikes, but still they feature hydraulic brakes, integrated shifters, cables and hoses running every which way. Narrower 11 and 12 speed cassette spacing means your cable tension, derailleur hanger, and limit screws must be perfect, and your front derailleur needs to be perfectly aligned, so your shifting is perfect. The Microshift 9 speed Advent Rear Derailleur is a breath of fresh air. It's easy to set up and the clutch is really a bonus to navigate the rough stuff.


The front derailleur doesn't have the most elegant cable routing but it is very functional and it shifts well. Additionally, the curvature of the cage is the perfect match for our 50.4 46/30t Crankset, so it really looks buttoned up.


11sp Dia-Compe Downtube Shifters pull the derailleurs around. Shifting is clean and easy. I had almost forgotten how much I like good downtube shifter setups. While I could have gone for the regular (non 11sp) version, I may go to 11sp or 10sp Shimano in the future. Interestingly enough, if you want to talk future-proofing, these downtube shifters are gold. They work with every 10 and 11sp rear derailleur.


The cockpit is our Nouveau Randonneur Bars and the brake levers are an aero offering from Shimano. I have always been a fan of these. The profile is slender, medium amount of hood length, great lever throw, and they do not overwhelm the appearance of the front end of the bike.

The tape is a sample. It has a nice texture and thickness, but I'm a bit skeptical of its longevity. We have two other samples we're currently testing that we really, really like. Stay tuned.


A Removable Faceplate Quill Stem secures the handlebars to the threaded fork.


Braking is handled by my favorite mechanical brakes, the TRP Spyres. They are super easy to set up and braking power is great once the pads are bedded in.


Clean, internal routing for the rear brake.


The Polyvalent prefers a front-bias, so a Campeur Front Rack handles the load of both a Randonneur Handlebar Bag and panniers. Be sure to check out this blog post I wrote a while ago about Front Loading Basics if you're front-load curious.

The front fender is mounted directly to the underside of the front rack so that the fender is secure over washboard trails.


The wheelset is our 26" Voyager Rims laced to our Disc Touring Hubs. They're all wrapped up in Rene Herse Rat Trap Pass 26x2.3" Tires. While the tires are exceptionally smooth over gravel and are lightweight, we find they need to be set up tubeless for durability. 

When setting them up with Orange Seal (our preferred sealant) you'll likely need to use a lot more sealant than you think since the sidewalls will both weep and absorb a lot of sealant. I think I ended up using about 7 oz of sealant per tire to have a reserve of sealant inside. As a reference, a 26" mtb tire needs about 3oz. The cost of suppleness.


The Day Tripper Saddle Bag houses all of my tools, tube, and repair bits and bobs I may need out on the trail. By the way, the next round of Day Trippers will have new YKK buckles (not pictured) that will be easier to open and close when using bulky gloves.


And the Randonneur Handlebar Bag is convenient for quick access to my camera, snacks, extra layers, and the like.


Lastly, the fenders are our 650b Smooth in Polished Silver which also have a great radius for these tires.


Can't wait to take this thing out on some Sporty Tours this season! You can find the full and complete build list here, and if you're interested in having us build up something similar, check out our Bike Build Ideas and give us a shout!


  473 Hits

CycleFans.com