|
|
|

143 Hits
|
|
|
By Scott
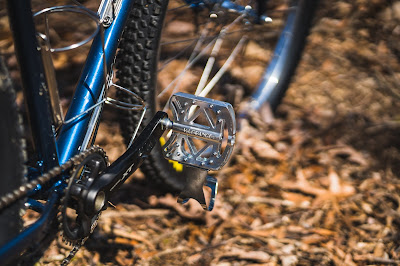
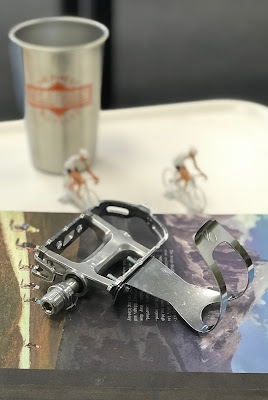
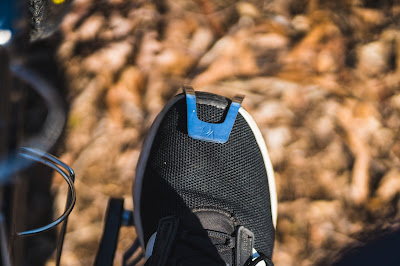
Half Clips are one of those sort of cycling products that you didn't know you needed until you knew they existed. For city riders using sneakers, boots, and canvas shoes, Half Clips are a blessing. No more having your feet fly off the pedals when your cadence reaches maximum RPM!
What makes our Half Clips shine are their generous height and width. Other half clips that we looked at were very low, which is fine if you were only using cycling shoes. For those of us who want to ride in boots or hiking shoes in the winter or sneakers in the summer, the taller height (3.3 cm from base to the top of the clip) of our Half Clips lets you fit your shoes in easily and more comfortably.
On the site here, they work with any pedal that has the holes to accept toe clips. You can even throw them on Sabot Pedals if you want the ultimate in shoe to pedal interface. We even include the hardware to install them. What sort of shoes do you use with your half clips? Let the world know about your combinations in the comments below.
FYI, we're going to discontinue them once this stock is depleted, so stock up now!
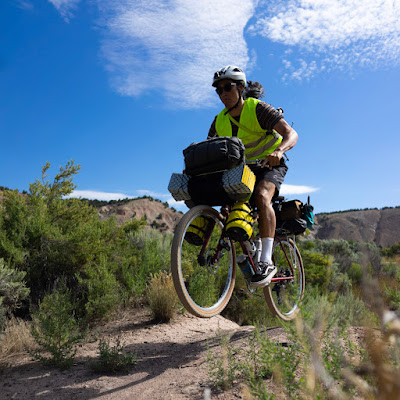
by Clint
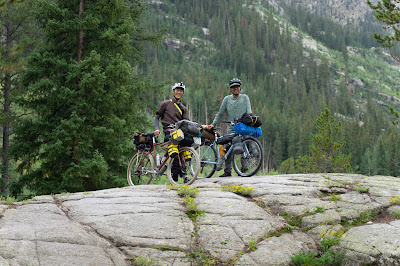
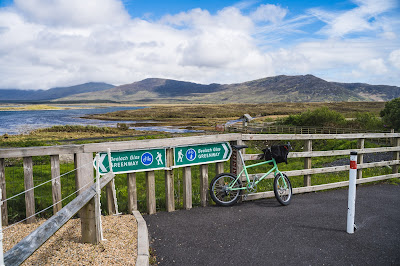
It’s been a while - both since I’ve written a post and ridden a fully loaded bicycle. I had been dreaming about this route for the past few years. Every time I would drive through the I-70 corridor in Colorado, I’d see this bike path that weaves in and out under the highway and next to the water. Very scenic despite being next to the interstate. I always wondered how far it went. Last year we drove through Independence Pass when it opened. The entire time I had wished I had a bike with me. Exploring by bike is one of my favorite ways to see a place, old or new. Everything looks so different than when you’re on foot or in the car.
Fast forward to early summer this year. My buddy Rico was starting to get curious about what a bike tour is like. So as any good friend would do, I tricked him into going on a 200ish mile tour with 9k+ feet of climbing on loaded bikes, some of which was at altitude. Just kidding. I didn’t think the riding was anything he couldn’t handle. He regularly commutes to work by bike, 15 miles each way. We broke up the ride into chunks. 40 to 50 miles per day over 5 days with a rest day in there. Very digestible. Honestly I was hoping the tour would be 100% type 1 fun and I would say most of it was. A little type 2 fun definitely snuck its way in there. More on that later.
Our route incorporates both of these super scenic bikeways, up and down mountains and over passes. I thought, what better bike to do this on than a Pass Hunter! It’s a versatile frame and packs up well with modern touring gear. I'll delve into the equipment in Pt. 2 of Independence Pass Hunting - coming soon!


.jpg)


.jpg)


.jpg)
.jpg)


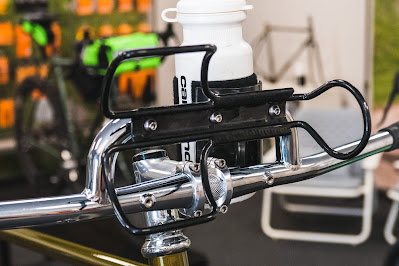
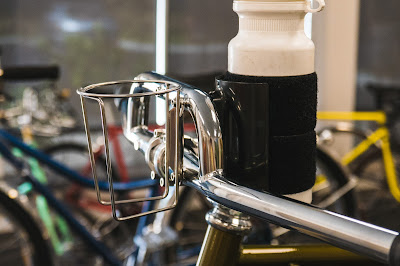
by Igor
Parts bin builds are some of my favorite. For very little budget, you can put something together that is unique and fun. This particular Waterford has been through a few iterations with mostly new parts including Campagnolo Athena, then Shimano 11sp bar ends with a new fork and Randonneur Rack, then upright with Curvy Bars, and now in its more roadie edition.
Starting from the hoods, we used some 6600-G 10 speed Shimano integrated shifters. What's the G you ask? Well, Shimano did a Grey addition of the 6600 series because it looks cool. There are matching derailleurs out there, but, you know, parts bin. The shifters had been sitting for a long time, and if you know, that generation of brifters suffered from assembly lube that gummed up over time. I've seen them nearly fossilize on bikes that had been sitting for years. No worries, some WD-40 into the shifter guts got things moving around again and the shifters were right back to clicking and clacking.
Connor wrapped the bars using Tressostar tape in a harlequin-style to match the paint's red-blue fade and it looks super.
The rear dangler is a Dura-Ace unit that has lived on many bikes and shifts up and down the 11-28 cassette perfectly. The front pusher is a non-series 10sp braze-on offering from Shimano. It's fine and shiny.


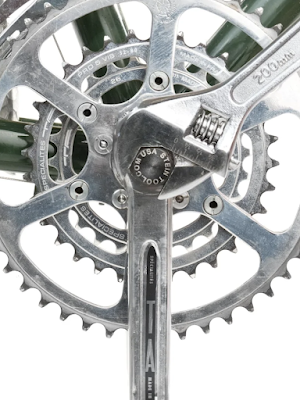
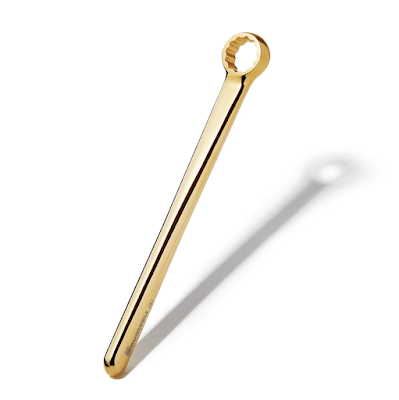
We're all a bit geeky when it comes to tools here. A lot of us have worked in shops and have a variety of tools in our own tool boxes that are not the box standard tool box entries.


by Scott
| Keith Barr Randonneur |
Some say that the best bike for the job is the one you have. And for many things, I think they're right. You don't need something fancy for commuting for example. A mid 80's mtb is a great starting point for a commuter that is tough and ready to hit the urban streets. For other cycle-born adventures, something a bit more specialized is sometimes required for the task. Take for example a bike for randonneuring. What is randonneuring you ask? Well, check out my post about it here for a detailed discussion. But to sum it up, randonneuring is an "organized ride of a distance equal to or greater than 200 km (125 miles) along a set route with a series of check points (controls) along the way. Time limits exist for the rides."
| Photo courtesy of Chasing Mailboxes |
The basic touchstone that I've always worked from for a rando bike is that the bike must be comfortable, efficient, and reliable. Going back to that blog post, a key aspect of brevets is self-sufficiency. You need to have a bike that doesn't break down and the parts are robust. And if something does break, can it be repaired roadside or commonly found in a bike shop?
| Igor's bike got hit by a car during a lunch stop. Wheel was un-taco'd and fender straightened roadside. |
As far as personal must-haves for a good randonneuring bike: solid and dependable drivetrain, comfortable handlebar and saddle, fittings for fenders, and clearance for wide-ish tires (28mm minimum) is a solid foundation. Hub-powered dynamo lighting, from-saddle accessible luggage, and electronic navigation would be the next step up - but not completely necessary.
Bike fit is absolutely paramount. You want to be comfortable on the bike for hundreds of kilometers. Super aggressive positions are rarely encouraged. An even saddle and handlebar position is a good starting point, with many opting to raise the handlebars a bit higher. We've always encouraged people to leave 5-10mm on top of their threadless steerers for future adjustment when building up their bikes.


.jpeg)


by Igor
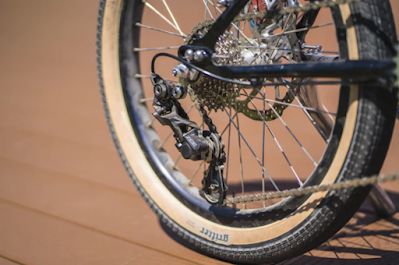
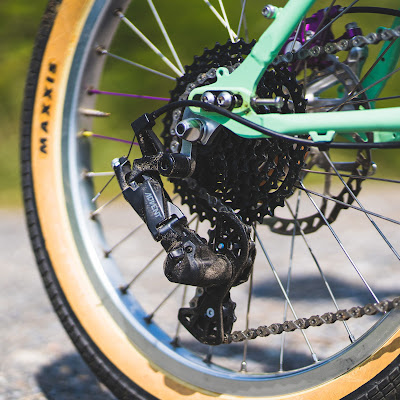
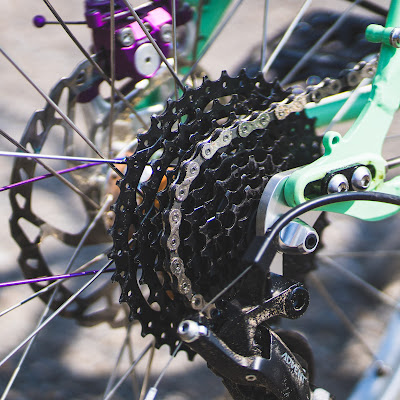
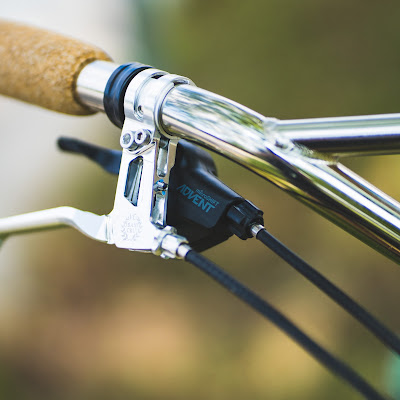
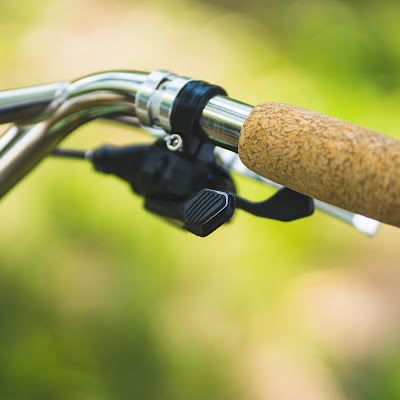
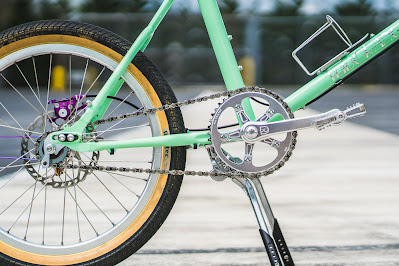
We usually recommend Shimano Zee or Sram road 1x derailleurs for Neutrinos, but those derailleurs and accompanying components can be hard to find reliably nowadays. So when I saw Microshift launch their new Advent Super Short groupset, I was thrilled. We ordered a group, mounted it on a Neutrino and started doing some testing.
Some background on the Neutrino drivetrain: because of the smaller wheel, you'll want a more compact (shorter) derailleur that ideally has a clutch. Basically something that has good range and good chain retention. The Shimano Zee (downhill components mostly) was really the only game in town for a while. But with supply chain interruptions it was very difficult to find Zee stuff.
| 10sp Shimano Zee |
We've also run Sram Rival and Force 1x rear derailleurs, but they are a bit longer since they are designed for full-size wheels. There isn't really a worry about them touching the tire when fully extended, but if you bump/bend your derailleur hanger, clearances are reduced. For the record, I've been running my Neutrino with a Rival rear derailleur and an 11-32 cassette for a long time without issue. For a much more in depth article about Neutrino drivetrains and setups, check out our Neutrino Tips and Tricks post!
| The chain is close, but it clears fine. |
Enter the Microshift Advent Super Short groupset. This group was originally designed for some of the new kids and smaller-sized mountain bikes that use 20-24" wheels. The idea is that you don't need enormous 10-52t cassettes for smaller wheels, the simpler 9 speed system is more affordable and easier to maintain, all the while having some really good performance for off-road activities. Honestly, it's kind of perfect for the Neutrino.


By Scott
We've had a great response to the Growtac Brakes that we introduced to the US market in April. We've been overwhelmed by the kind words folks have sent after getting their brakes, installing them, and realizing their actual power and braking abilities out on the trail. Additionally, the diversity of colors we offer has really livened up people's bikes and allowed for a lot of customers to brake out (see what I did there) of just plain black brakes for their bike.
We've also had lots of folks test out the brakes and publish their findings. The great people at Outpost Richmond wrote about the brakes here. Russ Rocca did a video comparison of the Growtac brakes vs the Paul Klampers vs the Yokozuna brakes here. And last, but not least, Bike Rumor did a review of the brakes on their site here. Some great comments there and all unsolicited from us.
We've also being sorting through products here at VO HQ and we have added some more items to our Specials Page. We have some Diamond Polyvalent frames there, plus we have 26" Snakeskin and Stainless Steel Fenders, Randonneur Handlebars, Noir Porteur Bars and Diamond Handlebar tape. So take a look and see if something there tickles your fancy.
Editorial by Scott
There is a term in the outdoor world - the Quiver Killer. The term refers to a bike, ski, or a kayak (and so on) that can do so many different things that it does away with the need for multiple bikes/skis/kayaks, and all you need is THIS ONE. "The one bike to rule them all" is often the sub headline or line in the opening paragraph describing the product. Well, I'll call folks out on that one. I don't really think one bike can do it all. Why - it has to compromise on something. Let's look at it from a couple perspectives.
A Polyvalent with generous clearances, mounts to carry stuff, and stouter tubing for reliability does really well as a tourer or commuting bike. But ultimately as a super go-fast roadie, trying to keep up with the fast kids on their carbon bikes? Not so much. To ride a heavier steel touring bike at that speed requires too much power to keep up with them for an extended period of time, at least for most riders.
I think people look at the idea of a quiver killer as a way to save money, to justify buying that one bike that will do everything, but the reality is that any bike, kayak, or ski that claims to do everything is ultimately a compromise in some way. To make a frame work as a touring bike, there are design aspects that have to be taken into account. And many of those aspects are not the same if we wanted to design a, for example, mountain bike. There are core elements of both styles that don't overlap in a bicycle categories Venn diagram.
Now if you're the type of rider that focuses on only one type of riding, let's say credit card touring, you could ostensibly have one bike like a Pass Hunter. It could be built up with some zippy components and be ridden on the road stripped down, gravel with some moderate knobby tires, and for a few overnights with some rackless bags!

by Igor


.jpg)


|
|
|

by Scott
One of the great things about VO Hubs is their tool-free disassembly. This gives you the ability to swap out the freehub bodies, replace a driveside spoke, or remove the cassette for travel all without the use of any cassette tools - a key feature of convenience and roadside serviceability on our hubs for years. How easy is it to do it? We'll use this short blog post to illustrate how easy it is.
The first step is figuring out what you are starting with. The stock freehub body that comes on our current-generation disc rear and cassette rear hubs is the HG11 spline for Shimano/SRAM 8-11spd. If you want to run something other than an 11 speed cassette, you'll need one of these spacers to allow for a 8/9/10 speed cassette to sit properly on the freehub body. We'll next look at the two other freehub options for you to change to:
Campy - This freehub allows you to use any 9/10/11 speed Campagnolo cassette on it. Campy did not change the overall spacing of their cassettes over the years like Shimano did, so you can use a variety of speeds on it without the use of an adaptor spacer.
SRAM XDR- This freehub body is designed by SRAM to allow use of a 10 tooth cog in the smallest position on the cassette. Taking up the same width as a Shimano HG11 freehub, it allows XD and XDR cassettes to be used on our hubs built into wheels designed for road spacing.


by Igor
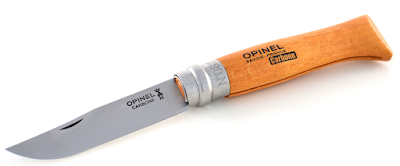
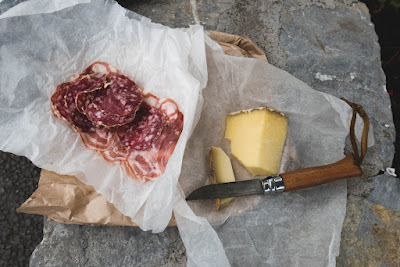
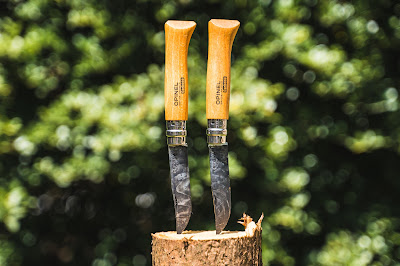
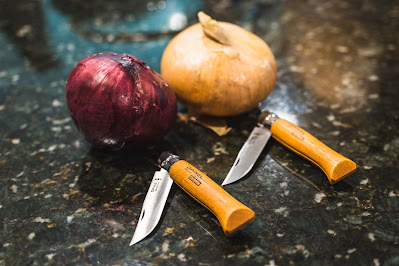
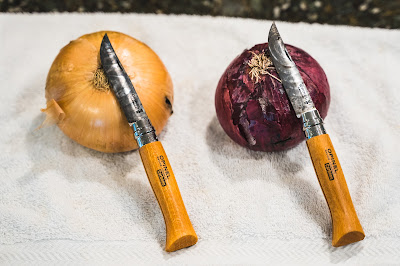
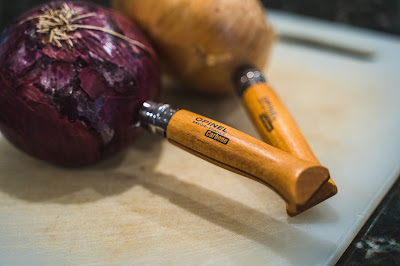
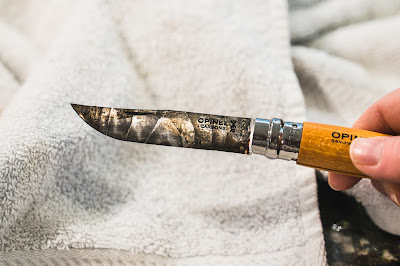
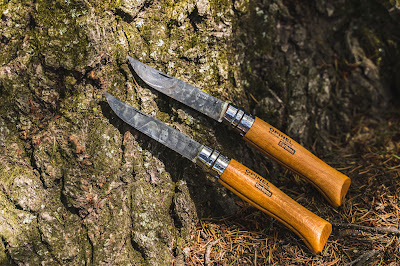
Folks typically associate patina with years of use, visible wear, and long-term care. There is an aura of warmth and satisfaction when you see a beautifully patina'd Leica, lock-up bike, vintage car, tool chest, or leather bag. Adrian found a fun article describing different ways to patina Opinel carbon steel and so we had to try it out. Some techniques involved chemicals and such, but we decided on a more natural method - stabbin' onions.
VO has been carrying Opinel knives for several years now. They're popular for their affordability, simplicity, and storied history as the go-to for French farmers, backpackers, and foragers. The carbon blade option does require more care and sharpening than their stainless steel offering, but carbon can take an edge easier. And because carbon is uncoated, they develop a nice patina over time. From Opinel: "Patina is completely normal and will help aid rust resistance of your carbon blade."
Here's what you need to create a beautiful patina on your carbon blade Opinel without years of use:
Opinel knifeOnion - white or red will do (we found no discernible difference in our test). Keep in mind you will be disposing of the onion once this process is done, so don't expect to use it in your next French Onion Soup or sandwich.WaterTowel48 hoursLiterally, stab the onion in the middle - all the way down the lock. We tried orienting the blade horizontally and vertically with respect to the layers of the onion and found inserting parallel to the root produced a circular pattern, while perpendicular was more wavy. Each of them is very cool.

|
|
|

|
|
|


by Igor
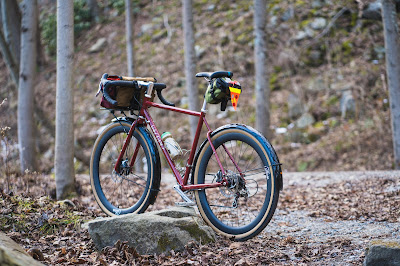
When the new Growtac Brakes came in, we knew we needed to do a special Pass Hunter build - something classic, sophisticated, and useful. And this has it has it all: Campagnolo, loads of silver, and hints of brown.
Don't let the fenders and racks fool you - this is a rocket ship!


by Igor
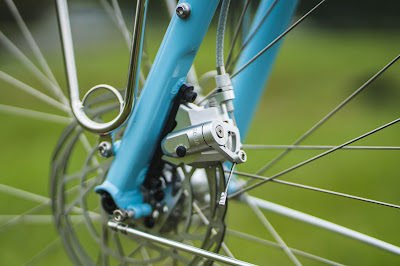
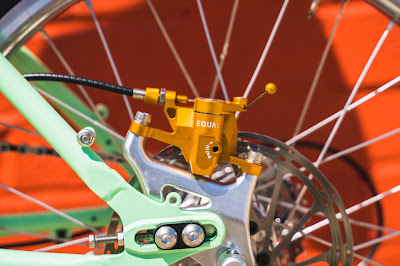
We are pleased to announce that VO is the official importer of Growtac Equal Mechanical Disc Brakes into the USA! We currently have them available in Flat and Post Mount brake styles.
If this is your first time hearing about the company, Growtac is a small engineering and manufacturing firm out of Tokyo, Japan that specializes in cycling products for indoor training - think trainers, rollers, and accessories. More recently, they developed a flat mount disc brake that struck my attention when I stumbled across them on an obscure Japanese Instagram story.
As soon as I saw these, I emailed Growtac and ordered up some brakes for evaluation. A few weeks later, they arrived. We unboxed them, mounted them up on my Pass Hunter and got to work testing them out. Immediately, I found a huge difference in stopping quality compared to the previous calipers. When I say quality, I mean the combination of several things including modulation, stiffness, and lever feel.
Brake modulation is the ability to precisely and accurately control the amount of clamping force on a disc rotor with a given amount of lever input. So, the more lever you pull, a similar amount of deceleration should occur. The rider should be able to feather the brakes to scrub speed, stop firmly before corners, and live comfortably on the edge of peak braking before lockup. Over the years, I've used many different cable actuated brakes from nearly every vendor out there, over a wide range of prices. The Equal brakes have an excellent level of brake modulation compared to other cable-actuated brakes and even some hydraulic set ups.


by Connor
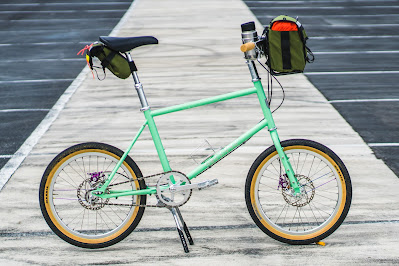
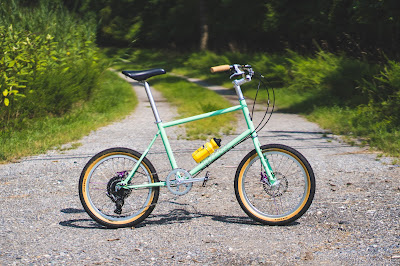
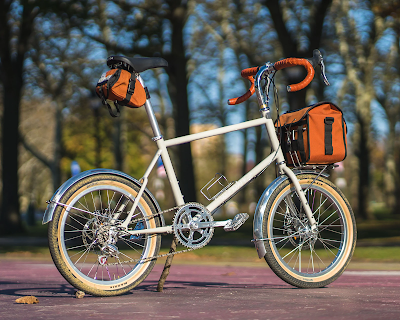
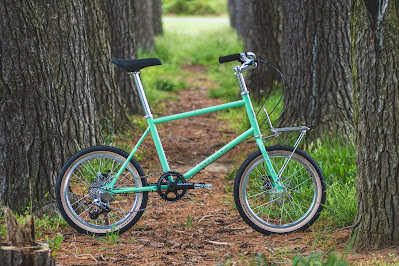
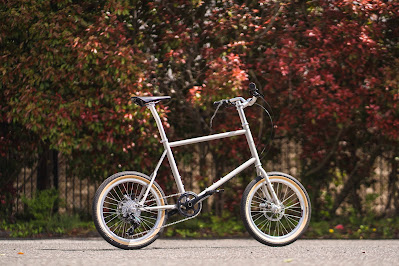
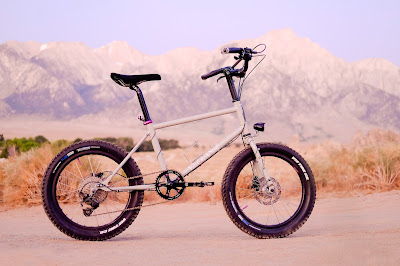
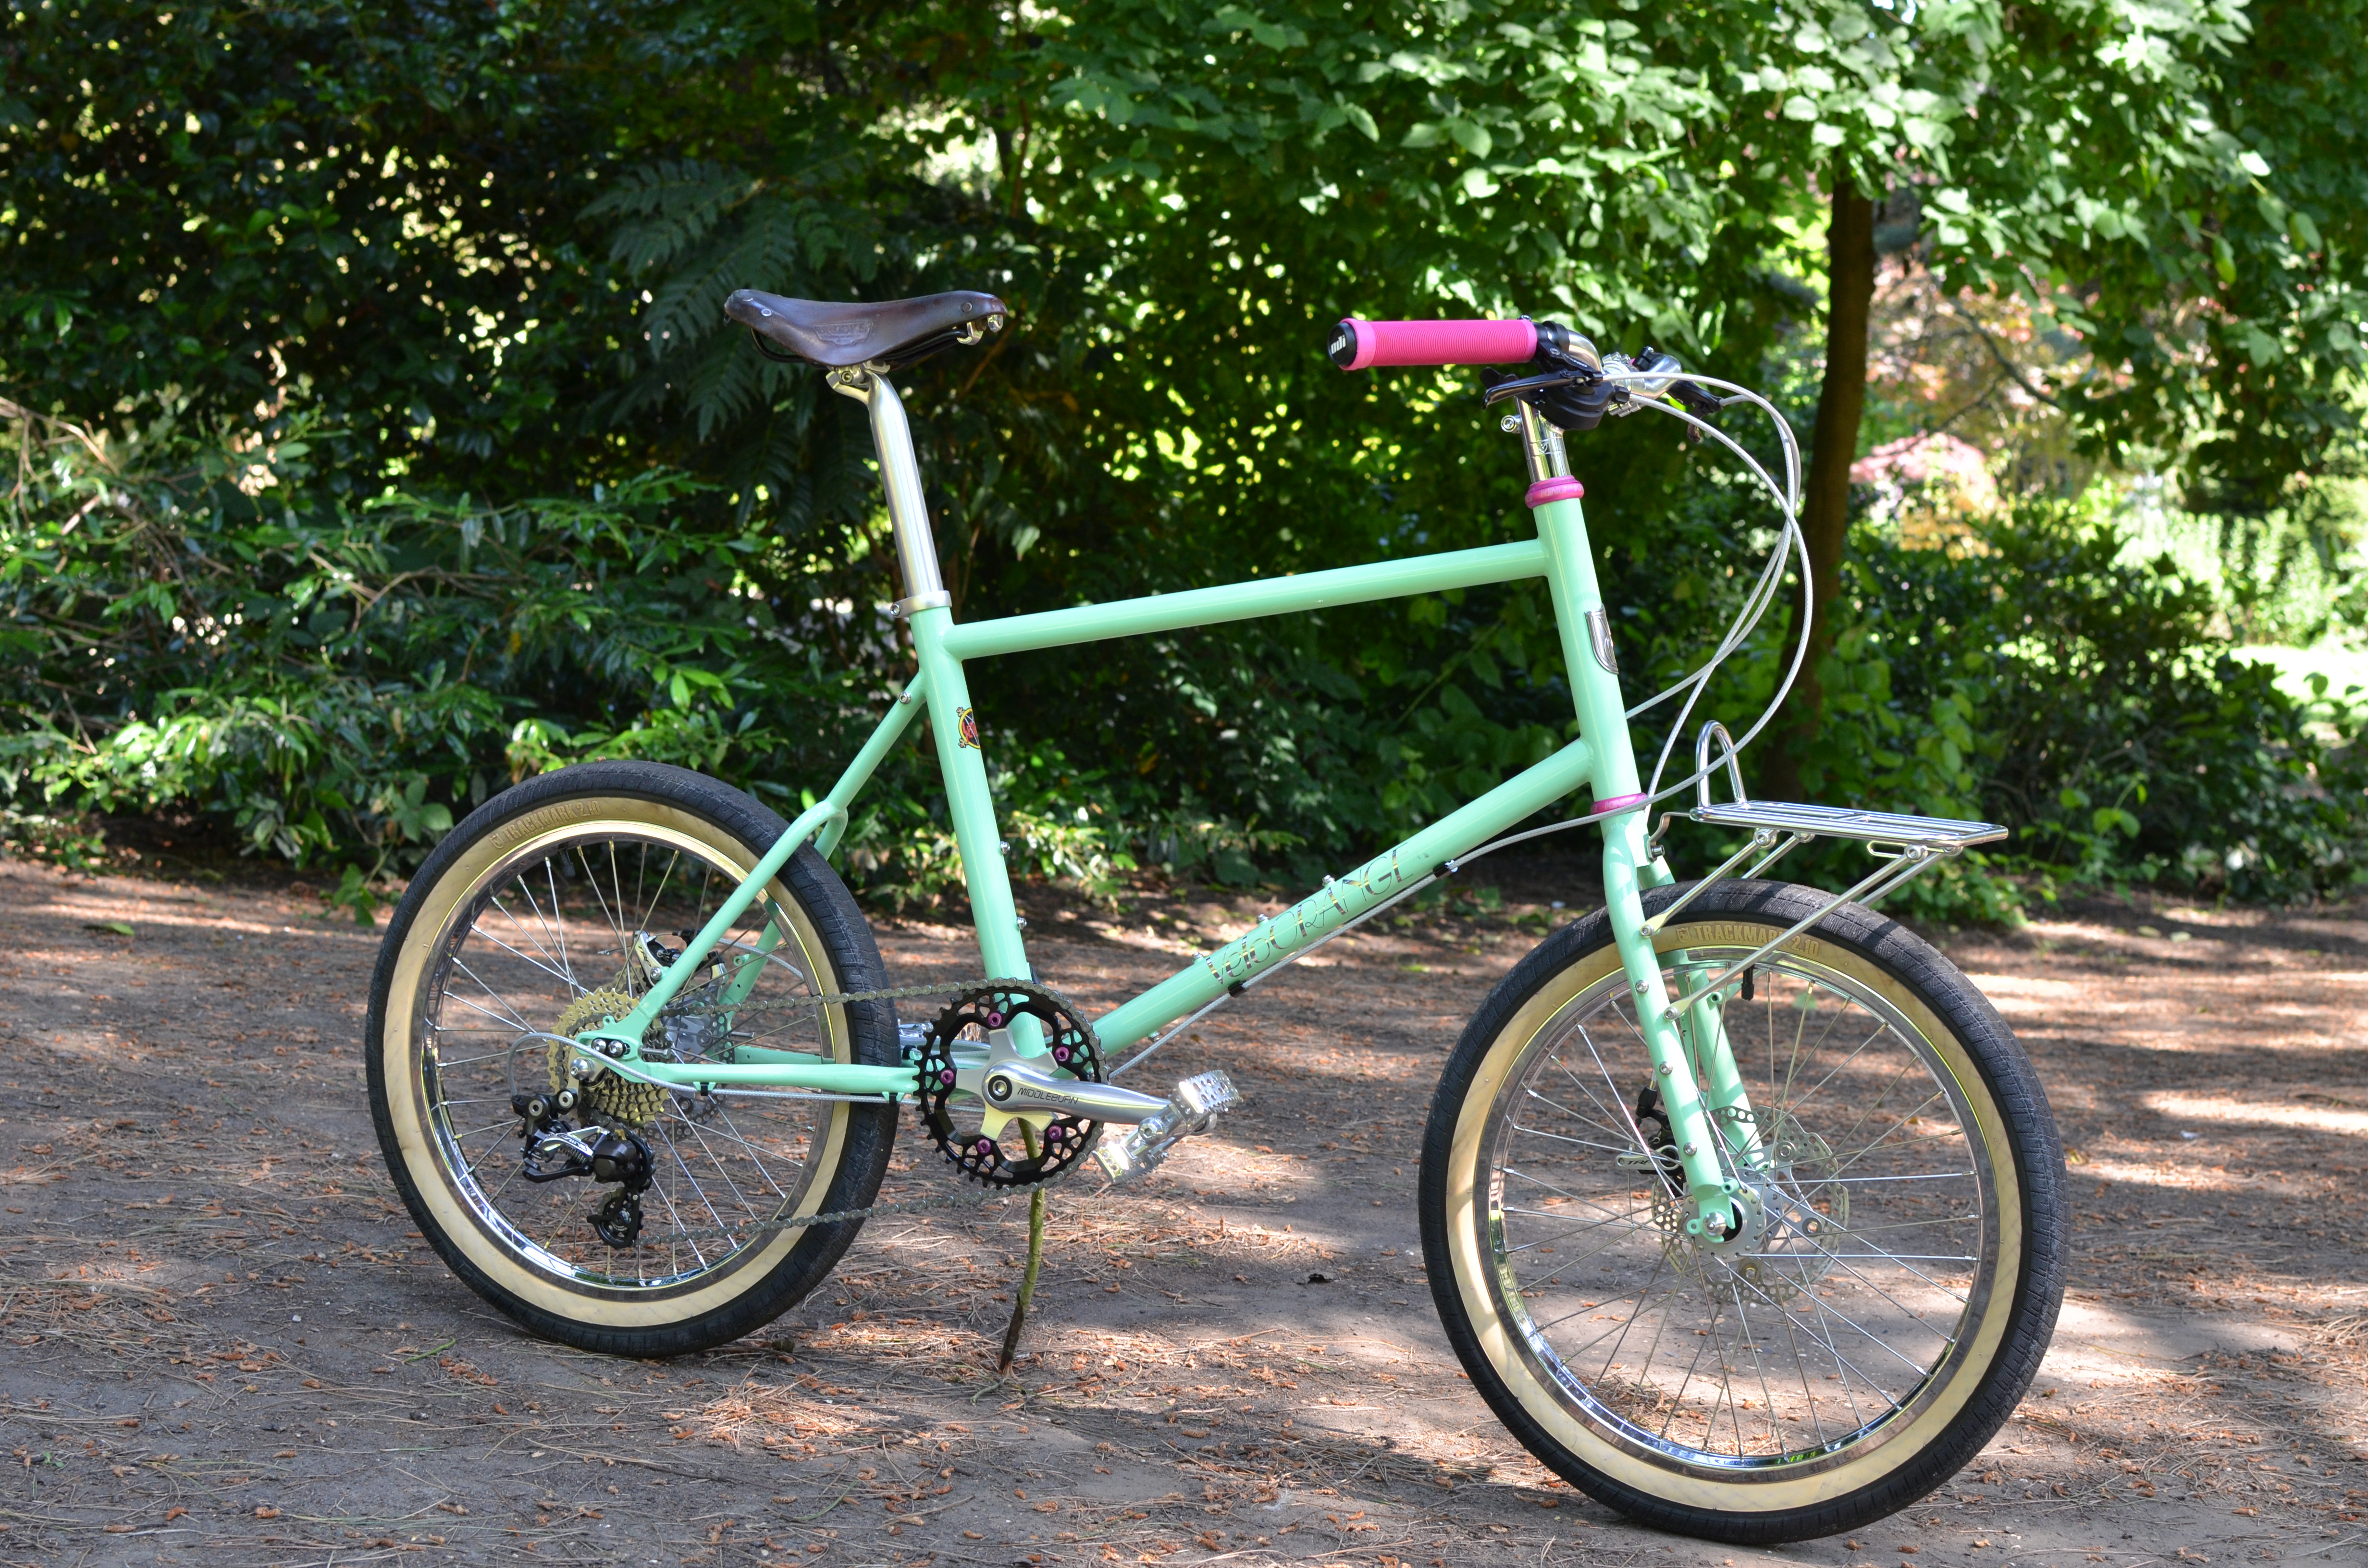
With our recent shipment of Neutrinos having arrived earlier this month, and with mini-velo wheelsets on the way any day now, we decided it would be a good idea to brush up on the technical specs of the bike itself and offer some suggestions of how to build up a complete bike. This quick and concise rundown is designed to help you find the correct build and fit for your own Neutrino Mini Velo.
Size Guide
You're not going to start a build kit without buying the right frame size first, so let's get into fit. Our Neutrinos come in Small, Large, and XXL. Because of the non-traditional nature of the frameset, we designed the Neutrino in only three sizes to span a broad range of heights and body dimensions.
The Small is best suited for folks in the sub - 5'6" (167cm) height range. Because of the low-slung, BMX-esque shape of the frame, inseam and stand over are largely irrelevant when it comes to frame size, making this bike ideal for folks struggling to find a bike small enough for them. The Large is our most popular size, and is designed for folks between 5'7" (170cm) - 6'1" (185cm). The XXL is for the taller folks, designed with those taller than 6'1" in mind. A higher and longer top tube boasts proper fit in a tiny package, and the steel construction of the frame provides a sturdy foundation for all sorts of tall riders. The XXL size frame doesn't really fit into a checked bag, but we had a lot of people asking for a size larger than Large, so there you go.


.jpg)

.jpg)
.jpg)
.jpg)
.jpg)
.jpg)
|
|


© 2024 CycleFans.com, a division of Outdoorsmen.com, Inc. Contact Us: 1 (888) 838-3396
.jpeg)
.jpg)